Please note that your subscription plan determines the specific set of features available to you, which may result in differences between what you see and the images presented in this article. For further details on the features included in your plan, please contact your OfficeSpace Admin.
With OfficeSpace, you can use utility icons to represent the locations of resources on your floor plan to assist your employees in finding what they need. You can place a new utility icon using Facilities Editor.
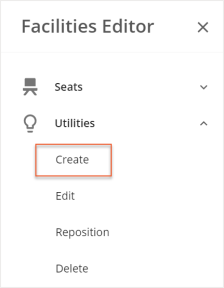
In the Facilities Editor, select the Utilities accordion menu. Then select Create.
Select the Select a Utility Icon field and choose your desired utility icon from the pop-up list.
Utility icons are listed in categories, allowing you to easily find the icon you need. You can also search for a specific icon using the search field at the top of the utilities list.

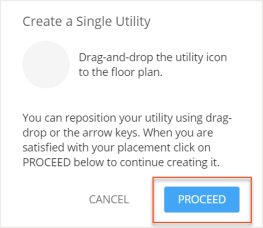
Under the Create a Single Utility section, drag and drop the utility icon to the location you want to place it on the floor plan.

After you’ve placed the icon in the desired location, select Proceed.
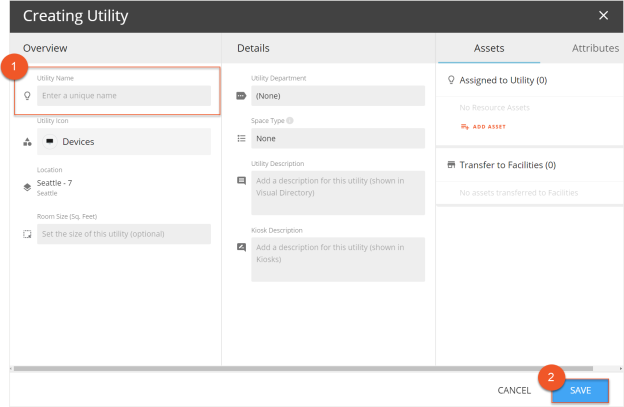
The Creating Utility screen opens. Enter in the Utility Name (1), as well as any additional details you would like to add for the utility, and then select Save (2).