Please note that your subscription plan determines the specific set of features available to you, which may result in differences between what you see and the images presented in this article. For further details on the features included in your plan, please contact your OfficeSpace Admin.
If you have a lot of moves to make, or a lot of moves have been scheduled for completion, it's easy to use Moves List to complete more than one move at a time.
Finding Moves ListOverviewSelecting MovesCompleting MovesEditing MovesCanceling MovesDownloading a Moves Report
Finding Moves List
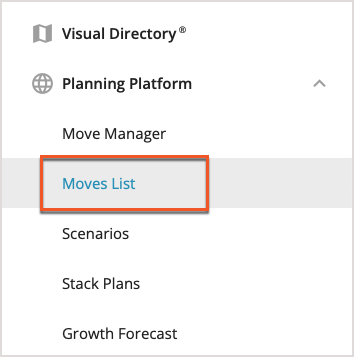
You'll find
Moves List in the Planning Platform section of the Hamburger menu.
Overview
Using Moves List, you can see moves that have been Requested, Scheduled, Completed, or Canceled using the
navigation bar (1) along the top of the screen. By default, you are shown Scheduled moves.
By selecting a date using the
date dropdown (2), you can choose to display only those moves that have been scheduled over a certain period. Selecting one or more locations from the
location dropdown (3) will narrow the list to a specific location in your organization.
The
Total (4) and
Conflicts (5) category bar graphs break down the displayed moves into further subcategories so that you can understand what situations are the most common among scheduled moves and potential conflicts. If you'd like to see the list of moves displayed as stacked bar graphs, select the
graph toggle (6) to do so.
The
filters (7) below each column heading in Moves List allow you to curate and sort the entire list by parameters of your choosing, including conflicts, types, and dates, and to search for specific employees or seats, among other data points.
The
view dropdown (8) lets you choose to view the list according to the available shared views, or to save new views, based on your chosen filters, for later use.
Finally, the
three-dots menu (9) contains the additional options listed below:
| Option | Explanation |
|---|
| Manage Columns | Controls what columns are visible, as well as the column by which the others are sorted |
| Download Excel File | Download a copy of the Moves List in XLSX format |
| Email Preferences | Set email notification preferences for move requests, either all sites and floors, or per site-and-floor |

Selecting Moves
To interact with moves in Moves List, select the
checkbox (1) next to a move to be presented with the
action buttons (2). You can modify all moves simultaneously by selecting the
checkbox at the top of the column (3).
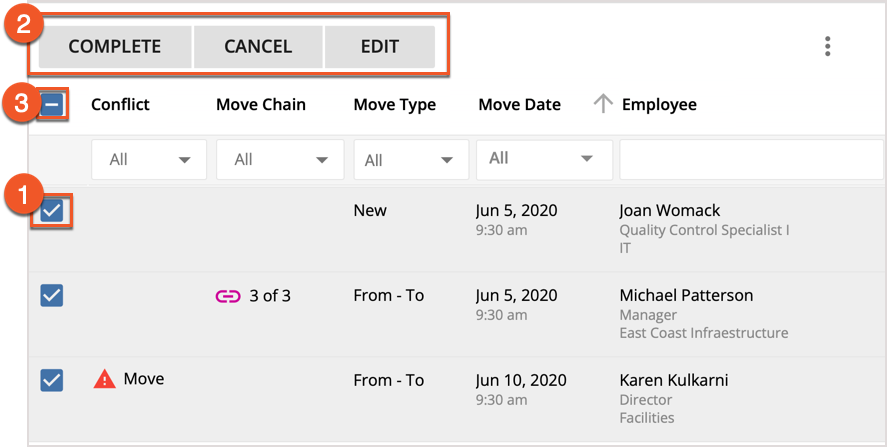
After moves are selected, they can be
completed,
edited, or
canceled.
Completing Moves
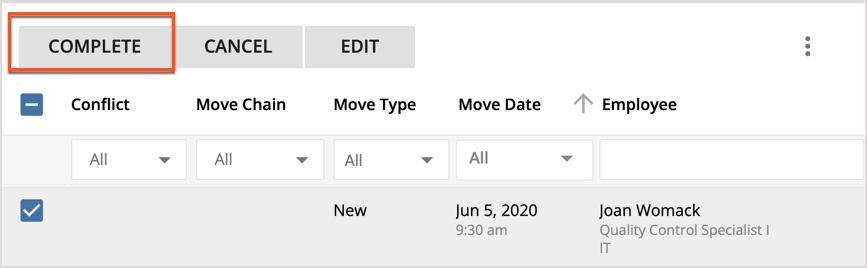
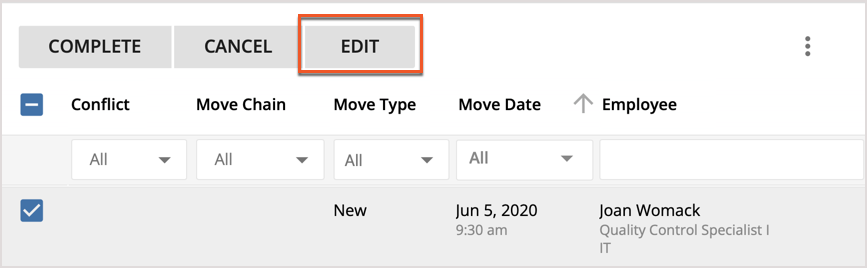
With your chosen moves selected in Moves List, select
Complete to begin completing your moves.
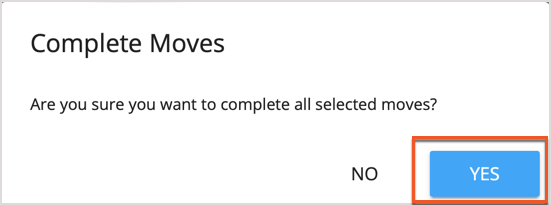
You'll be shown a confirmation pop-up, asking if you're sure you'd like to complete the selected moves. Select
Yes to confirm, and complete each of the selected moves.
Editing Moves
If you need to make changes to moves before completing them, you can make changes to multiple moves simultaneously by selecting them in the list, followed by
Edit.
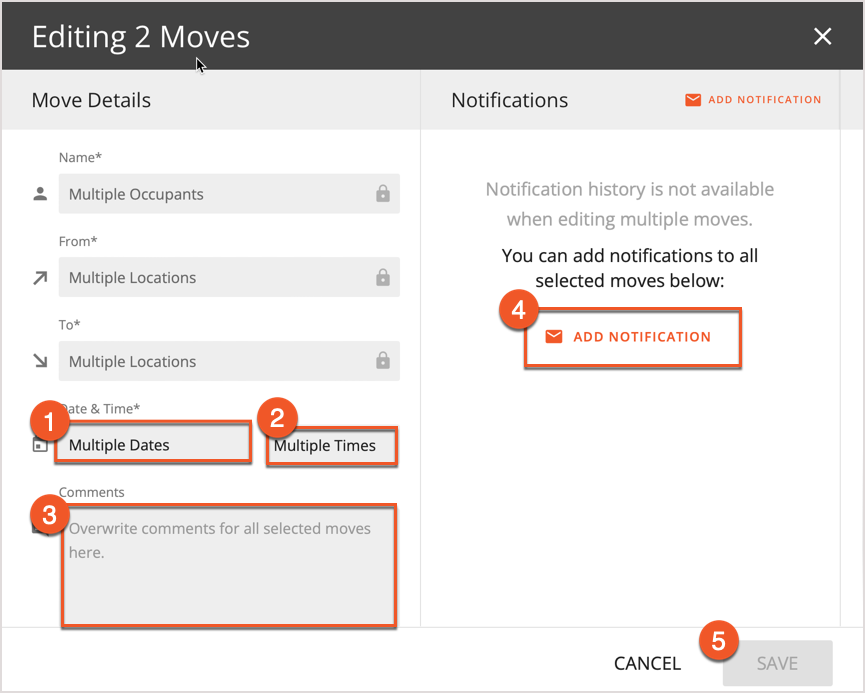
The Move Scheduler opens with the Name, From, and To fields locked. You can select a new
Date (1) and
Time (2) to apply to all of the moves, overwrite all of the
Comments (3) by typing in a new comment, and add
Notifications (4) to all of the moves.
When you've finished editing moves, select
Save (5) to commit your changes.
Canceling Moves
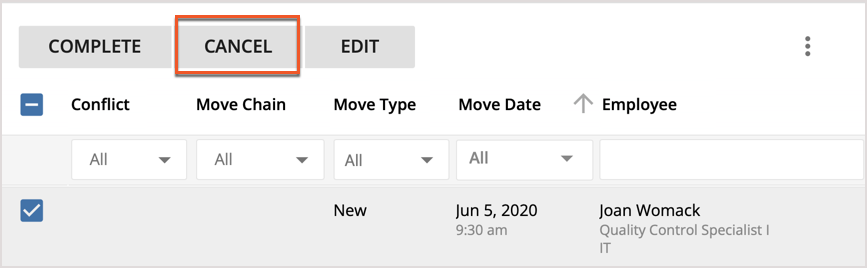
If you'd like to cancel your selected moves, you can do so by selecting
Cancel.
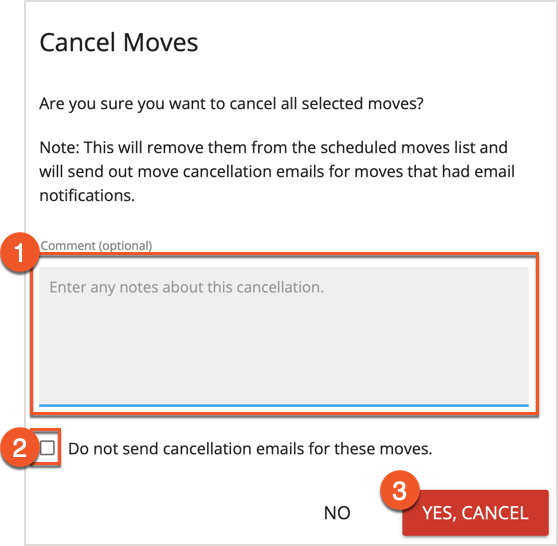
You'll be presented with a pop-up, asking you to confirm that you wish to cancel the selected moves. You can enter comments in the
Comment field (1) if there's information related to the cancellation that may be helpful later.
If you do not wish to send email notifications about the cancellation of the move, select the
Do not send cancellation emails for these moves checkbox (2).
To confirm the cancellation, select
Yes, Cancel (3).
Downloading a Moves Report
If you'd like a copy of the list of moves in a particular tab (Requested, Scheduled, Completed, or Canceled), you can download one by selecting
Download Excel File from the overflow menu above the columns in the list.

