Please note that your subscription plan determines the specific set of features available to you, which may result in differences between what you see and the images presented in this article. For further details on the features included in your plan, please contact your OfficeSpace Admin.
With User Role Settings, you have the ability to configure what your users can do within OfficeSpace. Different employees may use different tools within OfficeSpace depending on their roles and responsibilities. Using User Role Settings, you can control where each user role lands when accessing OfficeSpace, as well as grant additional permissions to select user roles, giving your employees more efficient access to the tools needed to accomplish their day-to-day tasks.
Locating User Role Settings
Managing User Role Permissions
Configuring Home Pages by User Role
Locating User Role Settings
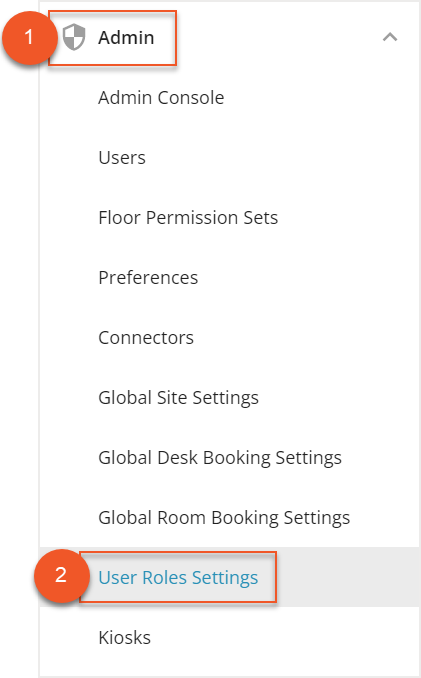
From the Hamburger menu at the top-right corner of your screen, select the Admin accordion menu (1) to expand it. Then select User Role Settings (2).
The User Role Settings screen then opens. There are two sections in User Role Settings: Permissions and Home Pages.
Managing User Role Permissions
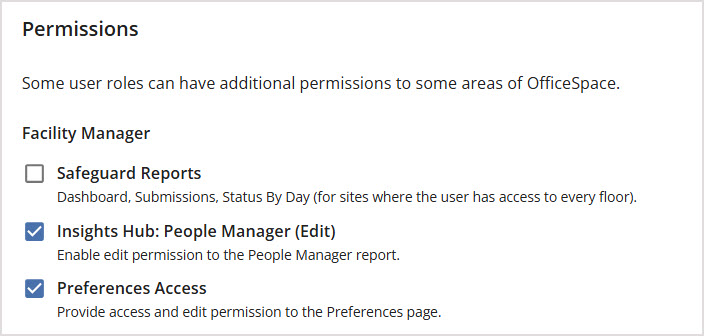
Using the Permissions section, you can add or remove permissions for select user roles, allowing you more control over user role access and the tasks your employees can manage with OfficeSpace. To learn more about user roles and what each role can do, check out the Introduction to User Roles article.
To grant additional permissions, locate the user role under the permissions section. Then select the checkbox next to the permission that you would like to grant. To remove permissions, de-select the checkbox next to the permission that you would like to remove for that user role.
Then, select Save Settings to save your selection.

Configuring Home Pages by User Role
Home pages allow you to manage which screen your employees land on when accessing your company’s OfficeSpace system. They can be used to immediately direct different user roles to the applications that they use most often, saving your employees time and making their workflow more efficient. Home pages can be configured by application or you can create your own custom home pages.
To configure the home page, locate the desired user role under the Home Pages section. Using the application dropdown, select the application that you would like the user role to be directed to upon accessing your company’s OfficeSpace system.

When you select your desired application, the subdirectory for the desired home page will be updated in the subdirectory field.

Then, select Save Settings to save your selection.

Now when a user navigates to your company’s OfficeSpace URL, the subdirectory will be automatically added to the end of the URL, and the home page will open by default.

Custom Home Pages
You are able to configure custom home pages for each user role. To create a custom home page, locate the desired user role under the Home Pages section.
Using the application drop down, select Custom.

Then enter the subdirectory for the desired screen in the subdirectory field. Use this format for the subdirectory: /subdirectory.

You can locate the correct subdirectory by navigating to the screen in your own OfficeSpace account. It is important to ensure that you enter the correct subdirectory so that the path is valid. Here is a list of some of the OfficeSpace subdirectories that are commonly used for home pages:
|
Application
|
Subdirectory
|
|
Admin Console
|
/admin
|
|
Move Manager
|
/manager
|
|
Insights Hub
|
/insights-hub
|
|
Visual Directory
|
/visual-directory
|
Then, select Save Settings to save your selection.

Now when a user navigates to your company’s OfficeSpace URL, the subdirectory will be automatically added to the end of the URL, and the home page will open by default.

