Please note that your subscription plan determines the specific set of features available to you, which may result in differences between what you see and the images presented in this article. For further details on the features included in your plan, please contact your OfficeSpace Admin.
The People Manager report contains valuable information about the employees in your organization, including their personal and contact details, their role, and their current desk occupancy type. You are also able to use this report to make changes to your employee records. This report can be found under the People Reports in the Insights Hub.
Viewing Your Employee Records
Reviewing Delegation Settings
Managing Views in People Manager
Manually Creating a New Employee Record
Modifying Employee Entries
Changing a Record from Active to Inactive
Managing Assigned and Associated Sites
Viewing Your Employee Records
The People Manager report provides a list of all of the employees in your organization who are using OfficeSpace, whether they've been imported using directory synchronization or added into OfficeSpace manually.

People Manager includes a variety of information about your employees organized into columns. Using the pin icon at the top of each column, you can choose to pin a column to the left side of the report.

When you pin a column, it remains frozen in place as you scroll along the report, making it easier to find the information that you frequently use. You are able to pin a maximum of six columns.
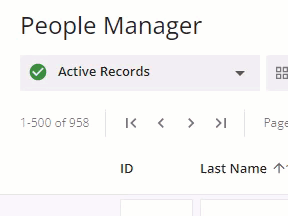
Using the status dropdown, you can also filter the report to show only Active Records, only Inactive Records, or show All Records.

Reviewing Delegation Settings
People Manager includes delegation details to help you review how delegation is configured across your organization.
Locate the delegation-related column in the report.
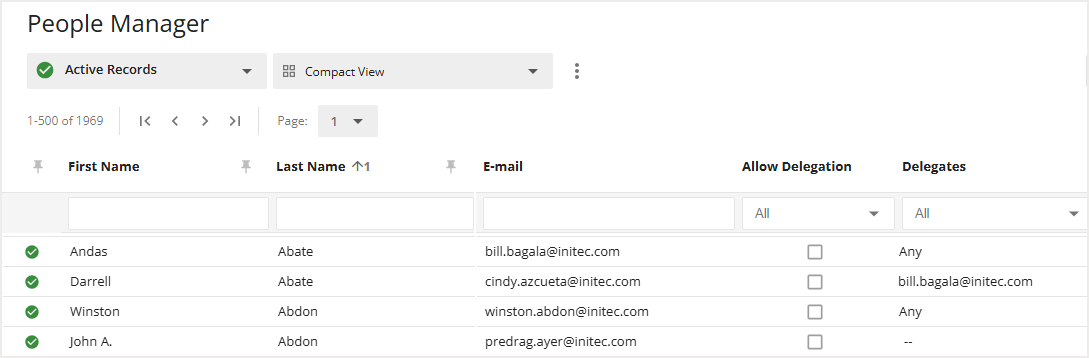
Confirm whether a user allows any delegate or specific delegates.
Review which delegates are assigned when specific delegates are enabled.
Inactive users are excluded from delegate assignment and should not appear as valid delegate options.
Managing Views in People Manager
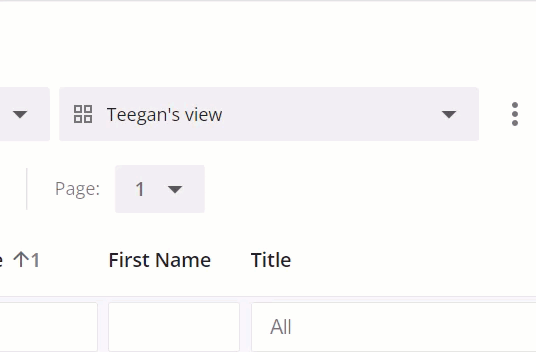
People Manager has a variety of tools and options available to help you drill down on the information that you are searching for. You can pin columns, sort the report by each column, move or hide columns, as well as filter and search for information. Using these tools, you can create a new view of the report that is best suited to your needs.
Views can be temporary, such as when you adjust the report to find a specific piece of information, but views can also be saved so you can easily find the same type of information whenever you need it. Views can also be shared with others in your organization.
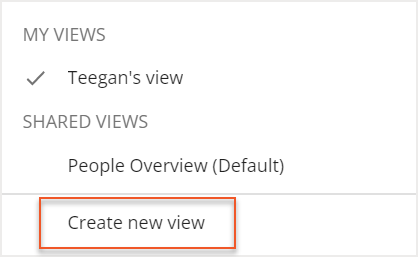
Your views can be located using the views dropdown. Here you will see the views you have created under My Views. Shared views can be found in the Shared Views section.
After using the tools in the report, you can save your desired configuration as a new view. To create your new view, expand the Views dropdown and select Create new view.
The Create New View screen then opens. Enter a Name (1) for the view, and then use the checkboxes (2) to decide whether to make this new view your default view or to make this a shared view. Then select Save (3).
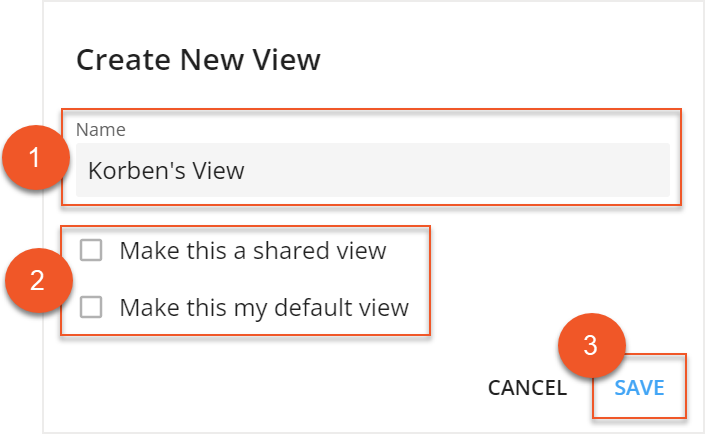
A default view will automatically display when you open the People Manager report. If you create a shared view, it will be visible to any user with access to the report.
If you want to make changes or delete a view, select the three dots next to the Views dropdown.

Manually Creating a New Employee Record
It's possible to manually add an employee record into OfficeSpace using the People report. Just follow the steps below! Remember that this workflow will only add the record in OfficeSpace, so the record will have to be added into your HR system by the appropriate administrator, if that's necessary.
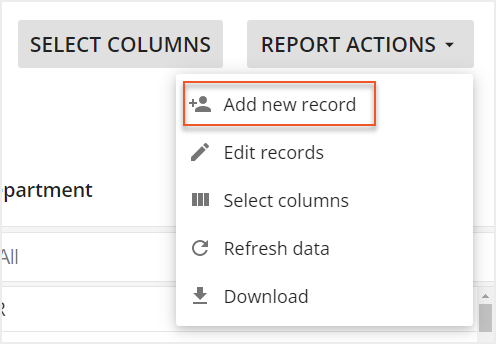
Expand the Report Actions dropdown on the right-hand side of the screen and select Add new record.
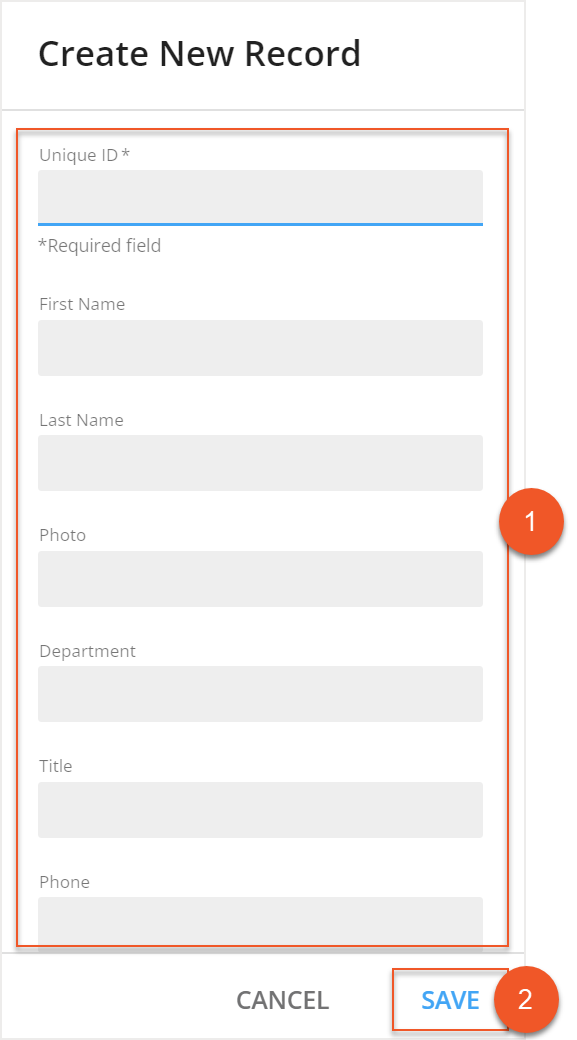
Fill out the necessary fields in the Create New Record screen (1), and then select Save (2).
The fields available to you may be different, depending on the employee information that was integrated with OfficeSpace. Fields can also change depending on the columns you have chosen to display on the report.
It is not possible to delete an employee record using the People report, but you are able to make an employee record inactive using the functionality described in Changing a Record from Active to Inactive.
Modifying Employee Entries
Much like adding a new employee entry, you can also modify an existing entry within People Manager, using the steps outlined below. Fields that are grayed out cannot be edited.
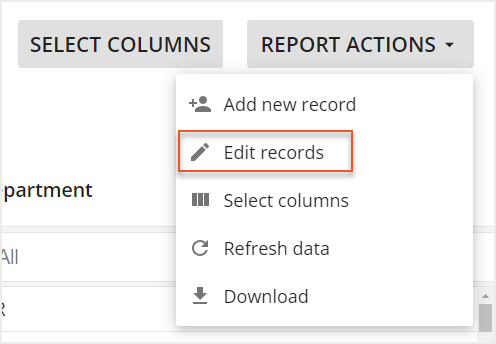
To enable editing, expand the Report Actions dropdown and select Edit records.
Double-click the field you want to update and type in the new information.
Select Save in the top-right corner to save any changes.

Changing a Record from Active to Inactive
In the event that you have inactive employees, such as people who have resigned or who have been terminated, you can manually deactivate them using People Manager.
To enable editing, expand the Report Actions dropdown and select Edit records.

Select the Active green checkmark on the far left of the employee record to deactivate this record. A red X appears to indicate an inactive employee. To reactivate a record, simply select the red X next to the record.

Select Save in the top-right corner. The record made inactive should disappear from your Active Records view.

If your HR directory is connected with OfficeSpace, then any records in OfficeSpace that are not received upon sync will be set to Inactive.
To change an employee record back to active status, use the status dropdown to locate the employee under the inactive records. To reactivate a record, simply select the red X next to the record.
Managing Assigned and Associated Sites
Assigned and associated sites are helpful in organizing your employee records, tracking where your employees are located, and determining the number of employees that are associated with your various sites. Assigned and associated sites’ data found in People Manager is used to generate associated employee metrics in other reports and dashboards. For more information on associated employees, check out the Workplace Trends Dashboard article and the Seating Needs report.
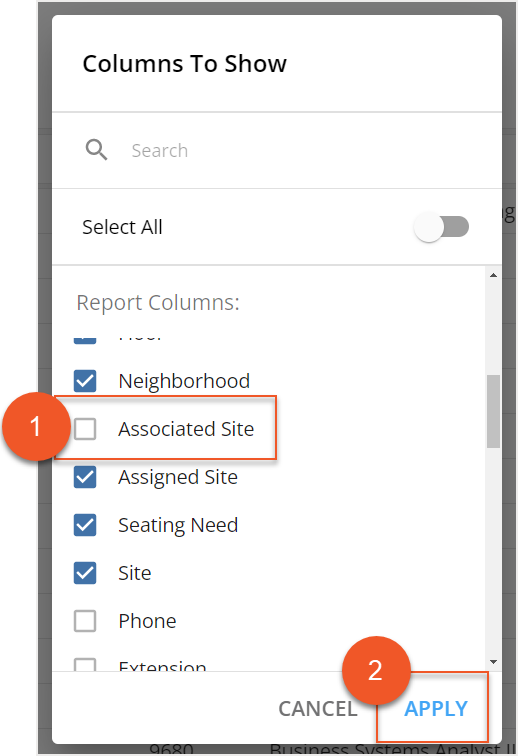
The Associated Site column is hidden by default. To display the column, choose Select Columns.

The Columns to Show popup then opens. Locate and select Associated Site (1) from the list, then select Apply (2).
You can edit the Assigned Site and Associated Site columns of an employee record using the editing function. Follow the steps under Modify Employee Entries for more information.

