Please note that your subscription plan determines the specific set of features available to you, which may result in differences between what you see and the images presented in this article. For further details on the features included in your plan, please contact your OfficeSpace Admin.
Creating Your FloorEditing Your Floor
Creating Your Floor
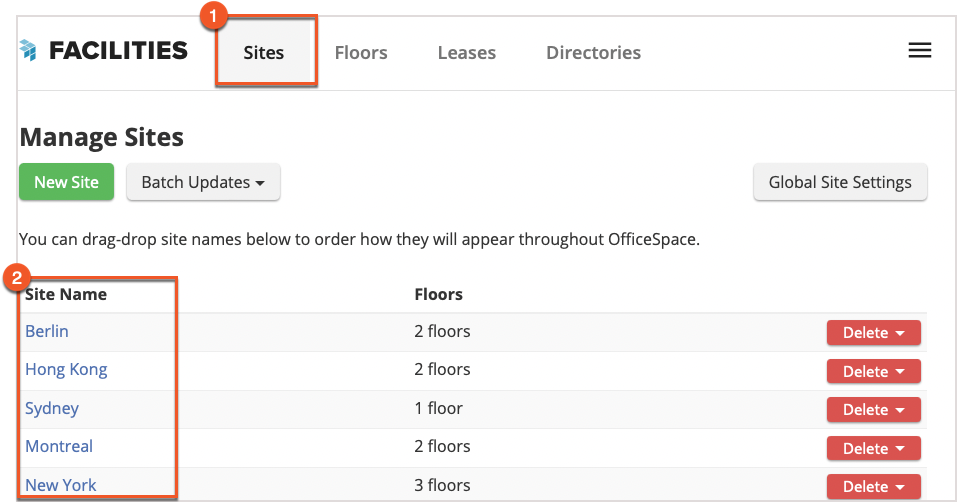
If you're looking to add a new floor to one of your sites, you can do so using
Facilities. From the main Facilities window, select
Sites in the navigation bar. Then select your site from the
Site Name column (2) to be brought to the Edit Site screen.
Adding a New Floor
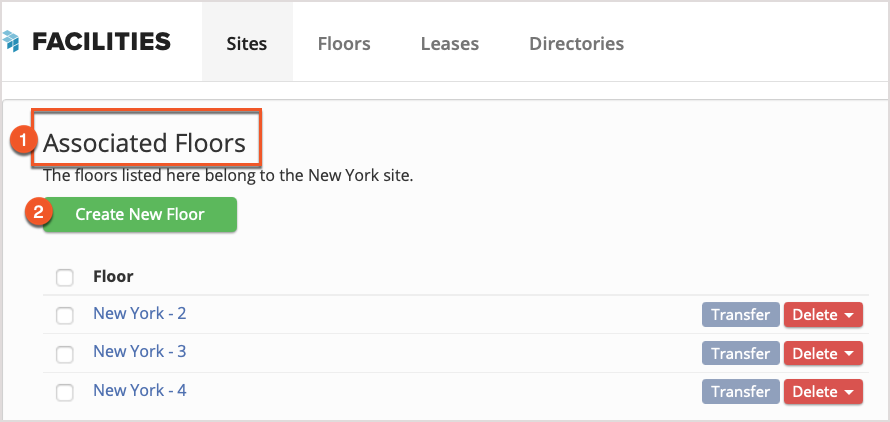
To add a floor to your site, scroll down to the
Associated Floors section (1). Select
Create New Floor (2) to begin the floor creation process.
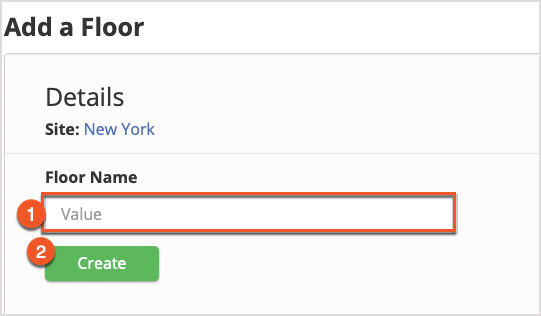
You'll now see the Add a Floor screen. Enter the name of your floor in the
Floor Name field (1) and select
Create (2) to proceed to the
Edit Floor screen where you can start creating your new floor.
Preparing Your New Floor
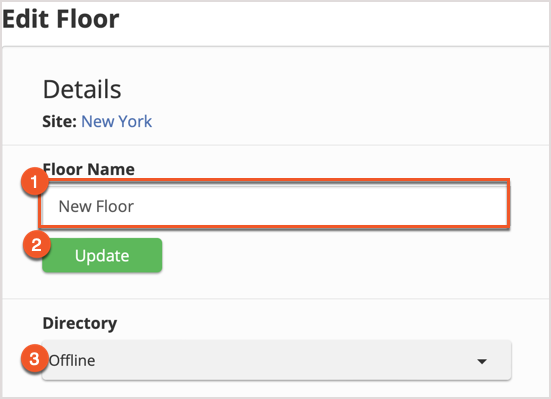
In the Details panel, you can change the name of your floor by editing the
Floor Name field (1) and selecting
Update (2).
In order to finish creating your floor, you'll need to enter some important information in each of the sections on the screen, including the
Floor Area Metrics,
Max Capacity, and
Floor Attributes.
After you've created your floor, you can make the new floor visible from this panel. Just select the Online option from the
Directory picker (3).
Editing Your Floor
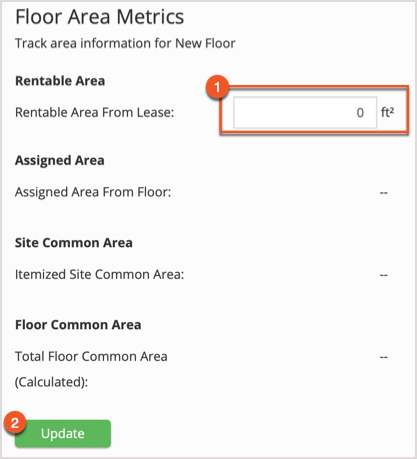
Floor Area Metrics
Using the Floor Area Metrics panel on the Edit Floor screen, enter the rentable area, as per your lease, for the entire floor in the
Rentable Area field (1).
Select
Update (2) to save your changes.
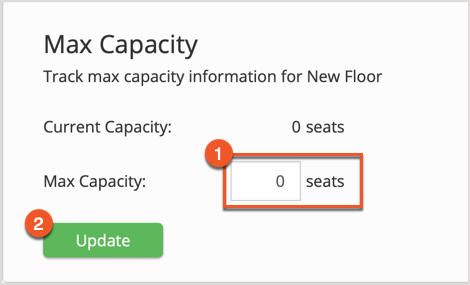
Max Capacity
In the Max Capacity panel, enter the
Max Capacity (1) (the maximum number of seats), as shown on your lease. Select
Update (2) to save your changes.
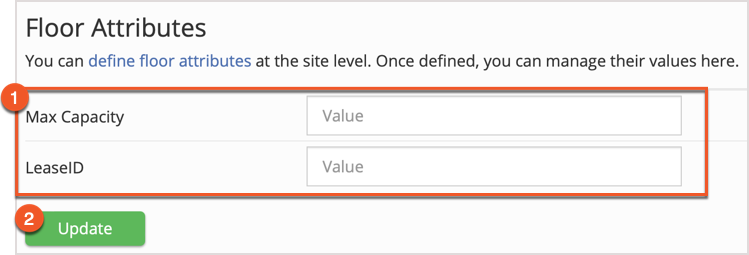
Floor Attributes
The names of these
fields (1) are defined at the Site level, but you are able to enter their values here once defined. Enter the values associated with the fields and select
Update (2) to save your changes.