Please note that your subscription plan determines the specific set of features available to you, which may result in differences between what you see and the images presented in this article. For further details on the features included in your plan, please contact your OfficeSpace Admin.
Facilities provides you with the necessary tools to manage your offices and workspaces, allowing you to keep track of necessary office details and make quick updates as your workspaces change. You can use Facilities to create and manage sites and floors, add or update your lease information, and create new directories. Using the Batch Updates, you can also make large changes to your site, floor, and room attributes.
Locating FacilitiesManaging Your Facilities
Locating Facilities
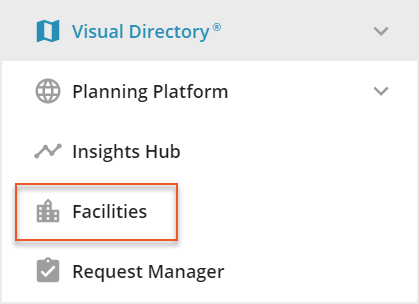
To navigate to Facilities, select the Hamburger menu in the top-right corner of your screen. Then select
Facilities from the menu.
In Facilities, you can navigate between the
Sites tab (1),
Floors tab (2),
Leases tab (3), and the
Directories tab (4) using the navigation bar at the top.

Managing Your Facilities
You can use Facilities to manage your various offices and workspaces. Available actions include making updates to your sites, creating new floors, managing which floor plans show in Visual Directory®, and more. In Facilities, you can manage your
Sites,
Floors,
Leases, and
Directories.
Sites
Under the Sites tab, you can view a full list of your different sites. Selecting a site from the list takes you to the Edit Site screen, where you can make changes to the site name, address, time zone, operating hours, square footage, attributes, and more. You can also use the Edit Site screen to override the Global Desk and Room Booking Settings, as well as Enable Future Booking Visibility. For more information, check out the
Site Specific Settings article.
Floors
Under the Floors tab, you can view a list of all your floors across all your various sites. Here you can make changes to the directory that the floor is housed in, as well as duplicate or delete the floor. Selecting a floor from the list takes you to the Edit Floors screen, where you can edit the floor name, which directory it is housed in, the square footage, the capacity, and the floor attributes. If you want to create a new floor, check out the
Creating and Editing a Floor article.
Leases
You can use the Leases tab to add or update your lease information. Select a lease from the Manage Lease screen to view or edit your existing lease details, including the lease dates, the type of lease, the lease status, the lease cost, critical dates, and the associated sites and floors. If there are any important documents relating to your leases, you can add them to OfficeSpace as attachments on the Edit/View Lease screen. For more information on leases, check out
this article.
Directories
Directories are used to group and categorize your floors, as well as allow you to decide which floors will display in Visual DirectoryⓇ. If you select the Directories tab, you are taken to the Manage Visual Directories screen. Here, you can create new directories or manage your existing directories. To learn more about directories, check out the
Moving Floors Offline or Online article.

