Please note that your subscription plan determines the specific set of features available to you, which may result in differences between what you see and the images presented in this article. For further details on the features included in your plan, please contact your OfficeSpace Admin.
With Requests, your management team can quickly and efficiently address the service needs within your offices. When your employees notice possible service opportunities or need your assistance, they can use OfficeSpace to easily submit requests. As a manager, you can use Request Manager to view the details of submitted requests and make decisions on how to respond accordingly.
Accepting Requests
Delegating Requests
Merging Requests
Updating Requests
Editing Requests
Closing Requests
Reopening Requests
Accepting Requests
After a request has been submitted, it shows as an Open request under the Active Requests Manager tab. Request Managers can then choose to accept the request to indicate that they are responsible for the request and working on resolving it.
To accept a request, locate it from the list and select it.
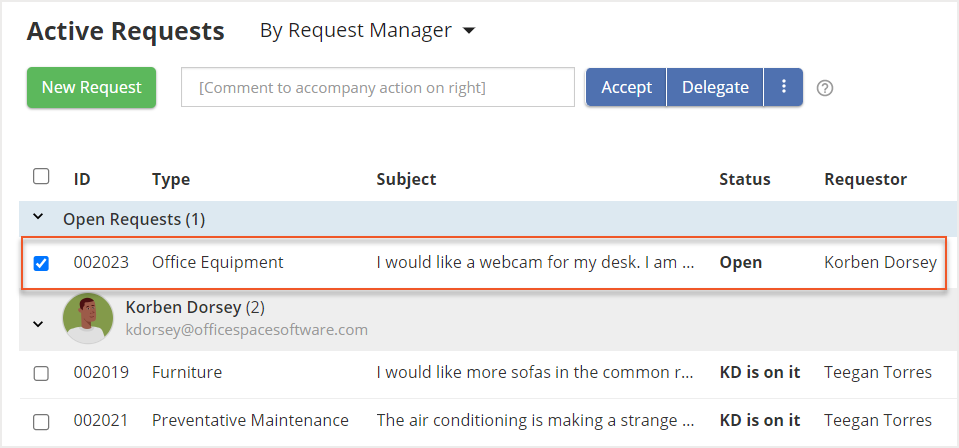
Then, select Accept.
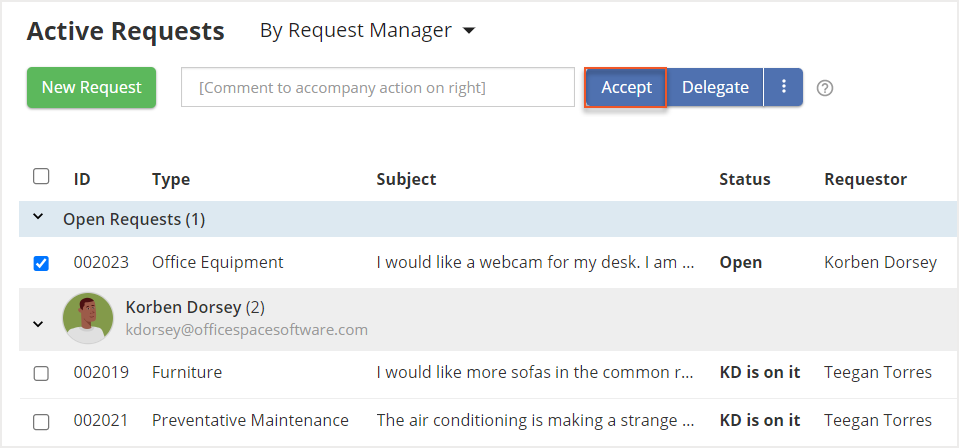
After you accept the request, its status changes to In Progress.
Delegating Requests
Open requests can be delegated to other members of your management team. Requests can be assigned to other Request Managers, who then become responsible to resolve the issues.
To delegate a request, locate it from the list and select it.
Then, select Delegate (1) and enter the email (2) of the manager you are delegating the request to.
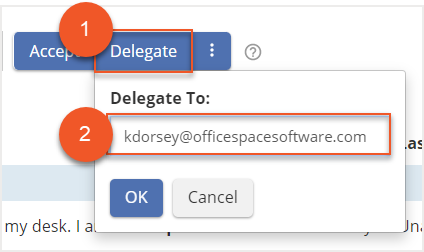
After you delegate the request, its status changes to In Progress.
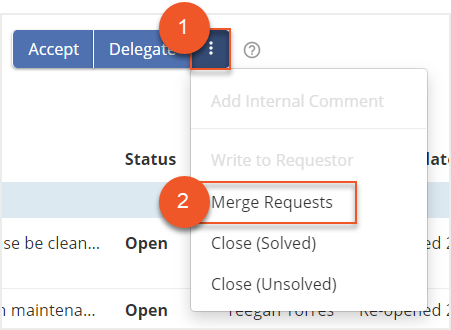
Merging Requests
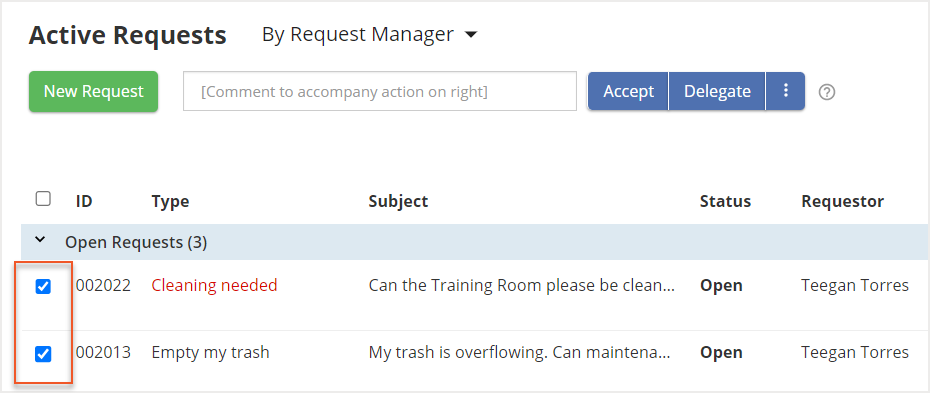
If you notice that multiple requests have been submitted for a similar issue or that a new request is similar to a previously-resolved request, you can choose to merge the requests. Merging allows you to remove duplicate requests and makes it easier to respond to issues.
To merge requests, locate the requests under the Active Requests tab and select their respective checkboxes.
Then, select the three dots (1) at the top. A list of actions is displayed. Select Merge Requests (2).
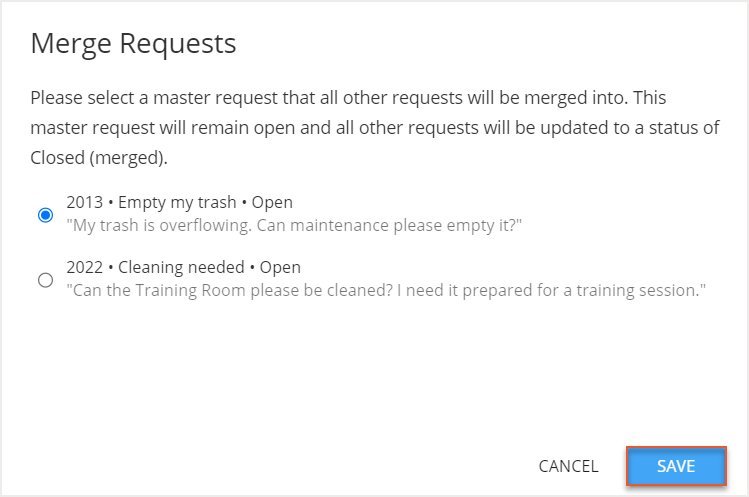
The Merge Requests screen opens. Select the request that you would like to be the “master” request. All other selected requests will be merged into this master request. The master request remains open and the other requests are updated to Closed (merged) status. Then select Save.
Updating Requests
As you work towards a resolution, there are a variety of actions you can take to keep the request and the requestor up-to-date. When viewing the request details, the Timeline will serve as a full history of your progress, but also serves as a tool to communicate with the requestor and leave internal notes.
Messaging the Requestor
Adding Internal Notes
Messaging the Requestor
When working on a request, you may need to message the requestor to keep them updated or ask questions. To send a message, type your message in the comment box.
Then select the three dots (1) and choose Write to Requestor (2) from the options.

The requestor will receive an email and a notification in Visual DirectoryⓇ. If the requestor responds to your message, you will be able to view it in the request timeline.
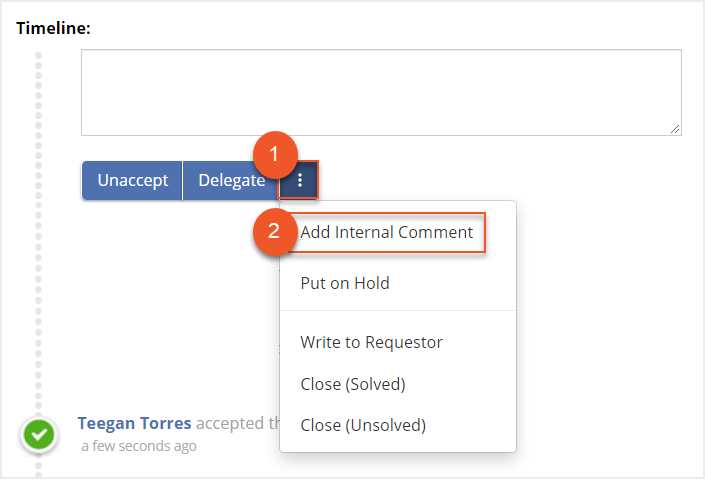
Adding Internal Notes
If you want to add notes or information to a request without sharing it with the requestor, you can use an internal note. To add an internal note, type your note in the comment box.
Then select the three dots (1) and choose Add Internal Comment (2) from the options.
You can view all your internal notes in the request timeline.
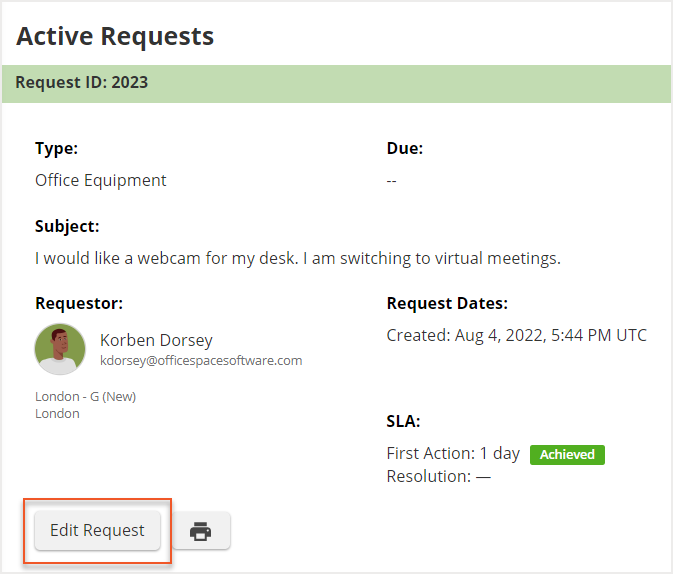
Editing Requests
To edit a request, locate it from the list and select it.
Then select Edit Request.
The Edit request screen will open. Here, you can make changes to various details, such as the request type (1), the description (2), the location (3), or any attachments (4). Then select Update (5).

You may want some request types to be available for specific locations only. Learn how to manage or add site specific request types in Managing Request Types.
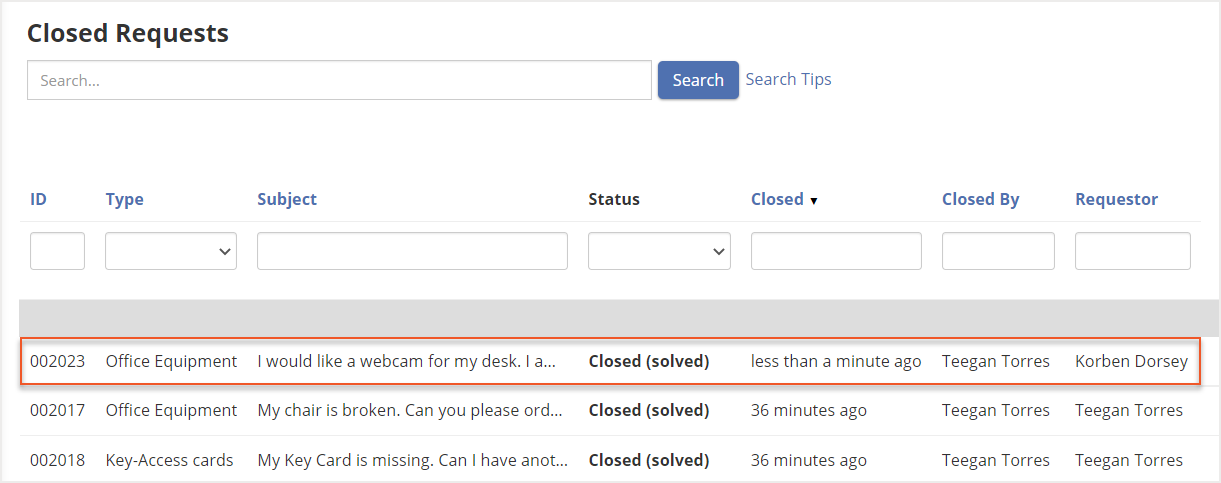
Closing Requests
When you are ready to close a request, locate it from the list and select it.
Then select the three dots (1) and choose one of the two close options (2) to close the request.
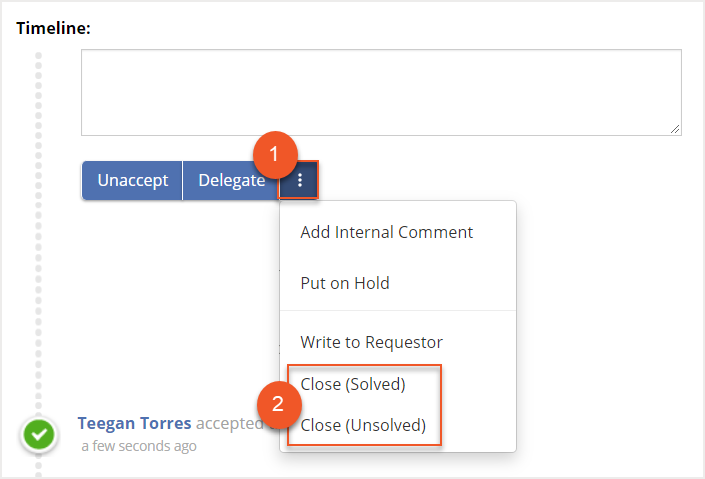
Close (Solved) is used when you have resolved the request successfully. Closed (Unsolved) is used when you are unable to resolve the request, but no further action is required or possible.
Reopening Requests
If you need to take further action on a request, you can choose to reopen the request. Requests can be reopened from the Closed Request tab.
To reopen a request, locate it from the list and select it.
Then select Reopen.
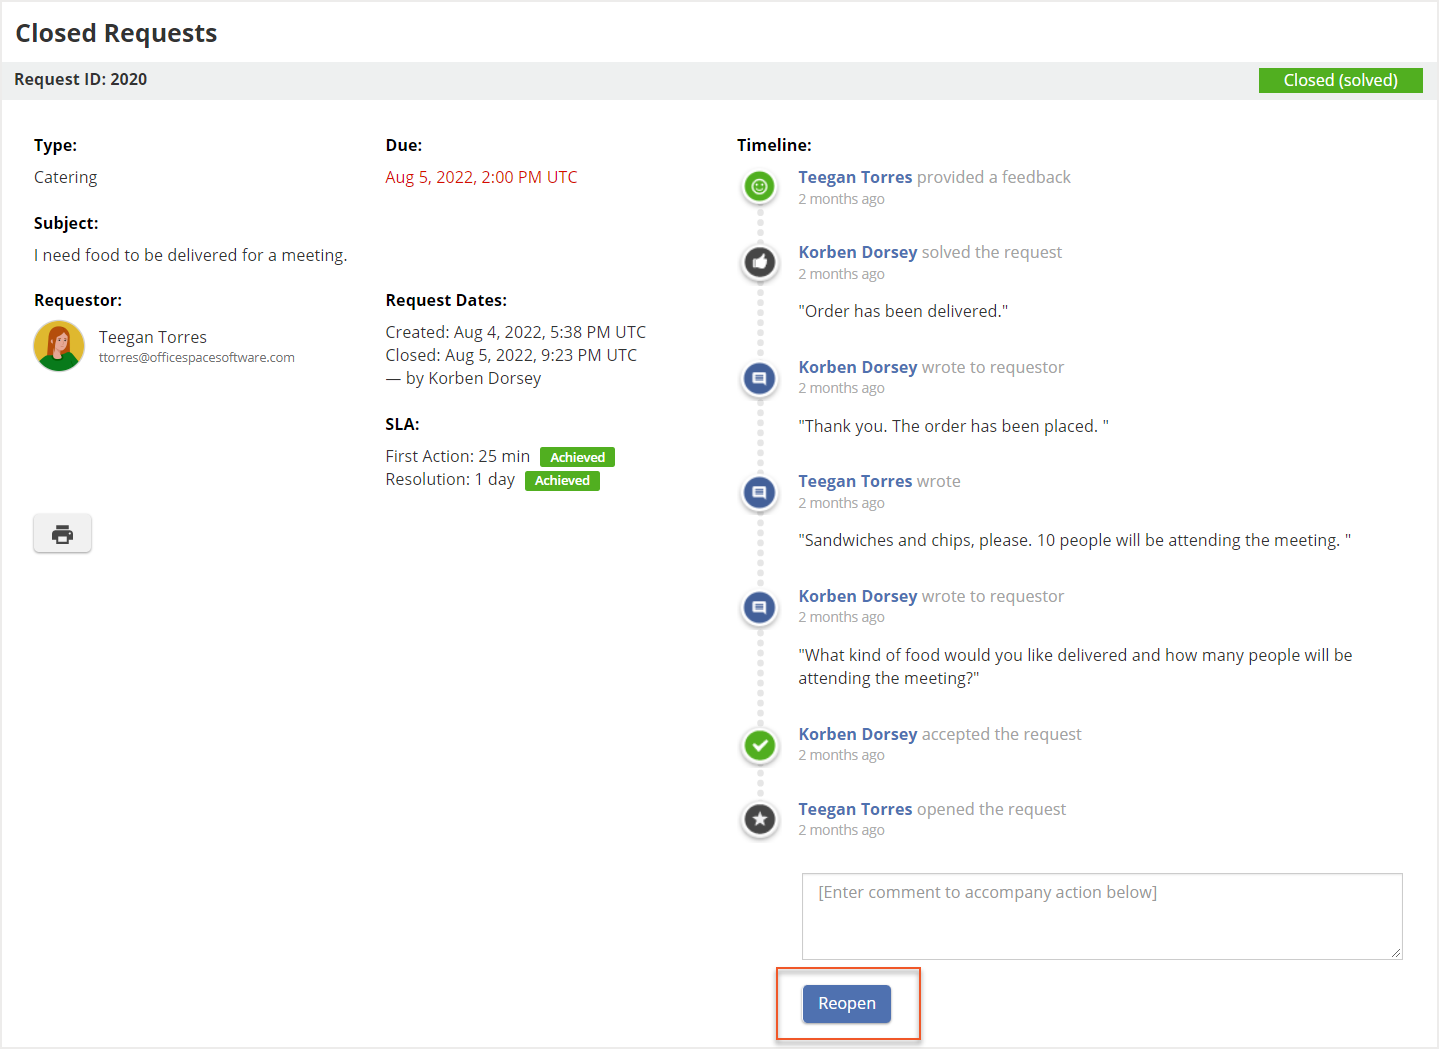
The request is reopened and now shows under the Active Requests tab.

