Please note that your subscription plan determines the specific set of features available to you, which may result in differences between what you see and the images presented in this article. For further details on the features included in your plan, please contact your OfficeSpace Admin.
Designations, also referred to as departments, allow you to allocate different desks, rooms, spaces, and employees to your company’s departments. As your company’s departments can be managed through your integrated directory software or through OfficeSpace, there are multiple ways for you to create and assign departments.
Manually Creating Designations with OfficeSpaceCreating Designations with Directory SynchronizationAssigning Departments to Individual Desks and RoomsAssigning Departments to Multiple Desks and RoomsAssigning Employees to DepartmentsResetting Your Designations
Manually Creating Designations with OfficeSpace
New designations can be created in
Manage Designations, which is located under the Designations tab in Preferences. Designations can be created individually or created in bulk.
Creating Individual Designations
To create an individual designation, select
Create New.

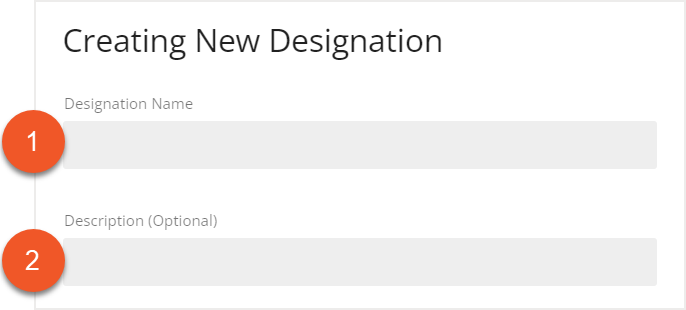
The Creating New Designation screen opens. Enter the
Designation Name (1) and add a
Description (2), if applicable.
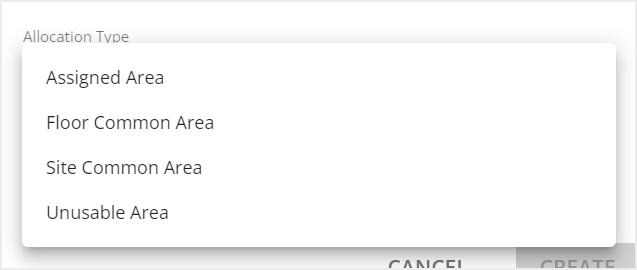
Using the
Allocation Type field, select the Assigned Area type, Floor Common Area type, Site Common Area type, or Unusable Area type from the list to allocate your designation.
Select the
Color field to choose the color of your new designation.

Then select
Create to create your new attribute.

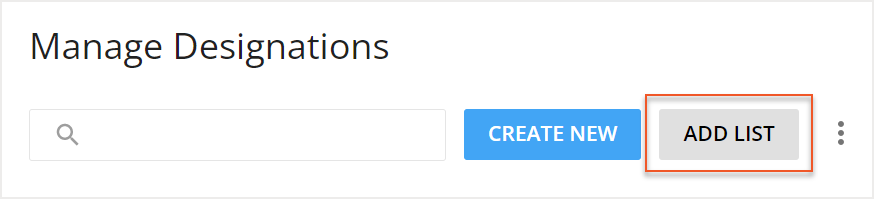
Creating Multiple Designations
To create multiple designations, select
Add List.
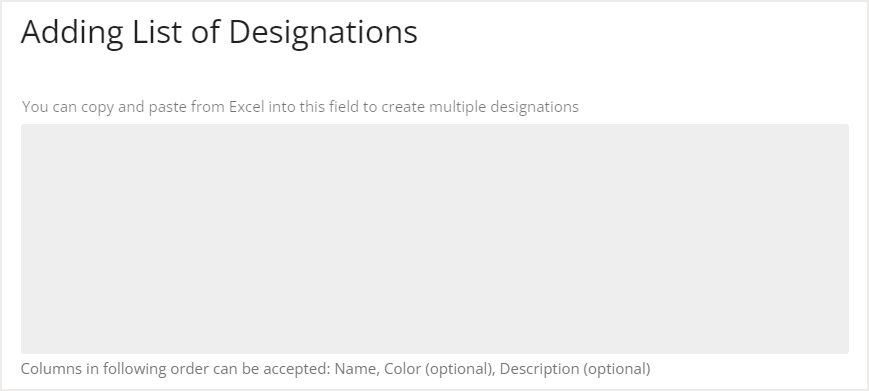
The Adding List of Designations screen opens. You can copy and paste a list of new designations from Excel into this screen. Ensure that the columns in your Excel spreadsheet are in this order:
Name,
Color (optional),
Description (optional).
After you have entered your list of designations, select
Add to create your new designations.

Creating Designations with Directory Synchronization
If your company uses Directory Synchronization to manage your employee information, the department designations for each employee will be updated after each sync. You can view the updated employee information in the
People Reports.
When an employee’s department is updated with a designation that does not exist in OfficeSpace, the list of designations in Manage Designations will not be updated until the employee is seated. Once the employee is seated, the designation will automatically be created in OfficeSpace.
You can use the Status tab in Manage Designations to view which designations were created using Directory Synchronization. Look for the
star icon under the Status tab to see all new designations that have been created after an employee with a new department designation was seated.

Assigning Departments to Individual Desks and Rooms
After you have created your departments, you can assign them to desks and rooms. If you have Department Tracking enabled, any occupied desks and room will be assigned to the same department as their current occupants. If you need to manually override this setting, you can use the Room or Seat Editor found in Move Manager. Departments are assigned in
Move Manager.
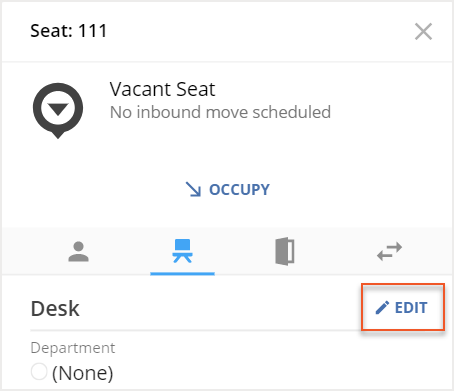
In Move Manager, select the desired desk or room on the floor plan to open the info card. In the info card, select the
Seat tab (1), then select
Edit (2).
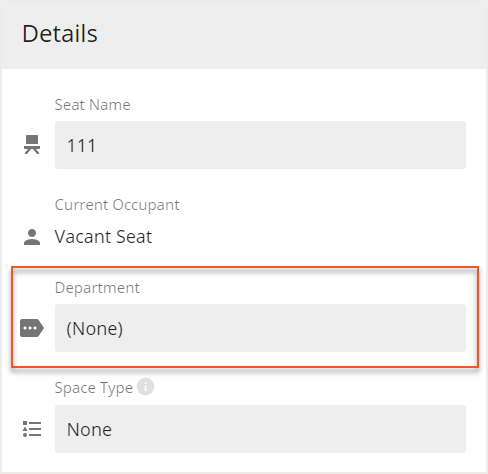
In the Edit Seat or Edit Room screen, select the
Department field and choose the desired department from the list.
Then select
Save to save your changes.

Assigning Departments to Multiple Desks and Rooms
Departments can be assigned to multiple desks and rooms using the Multi-Select tool. The Multi-Select tool is located in Move Manager.
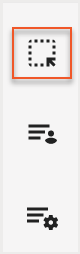
In Move Manager, select the
Multi-Select tool from the Action Panel.
Then use the
dropdown menu to choose either Selecting Seats or Selecting Rooms and Spaces.

On the floor plan, select the required seats or rooms.
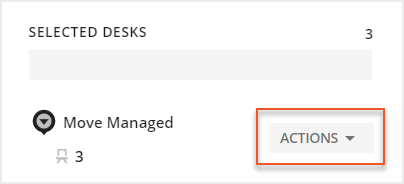
In the Multi-Select tool, expand the
Actions dropdown menu and choose Change Department from the list.
The Change Department screen opens. Select your desired
department (1) from the list and then select
Save (2).

Assigning Employees to Departments
If your company does not manage your employee department designations with directory software, you can manually assign your employees to departments using the People Manager report. Check out the
Modifying Employee Entries section of the People Reports article for instructions on editing the department information in an employee record.
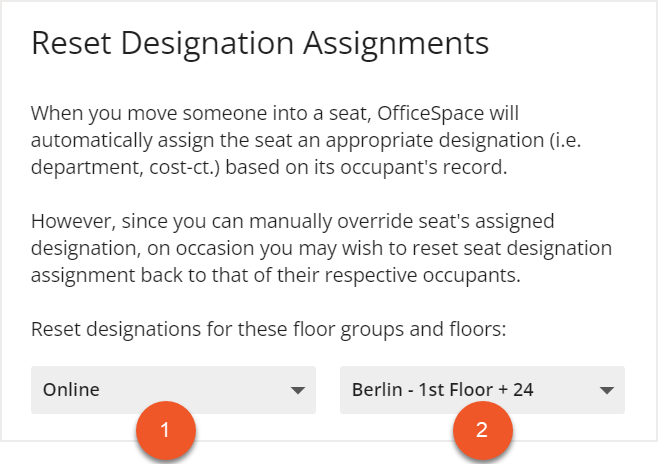
Resetting Your Designations
You have the ability to reset all department designations for your desks and rooms. Designations can only be reset by floors, either individual floors or multiple floors at a time. In Manage Designations, select the three dots next to Add List and then select
Reset Assignments.

The Reset Designation Assignments screen opens. Select a
floor group (1) and then select or deselect
individual floors (2) from the group using the two dropdown menus.
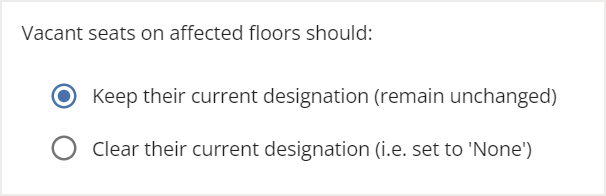
Next, select whether
vacant seats on the selected floors should keep or reset their designations.
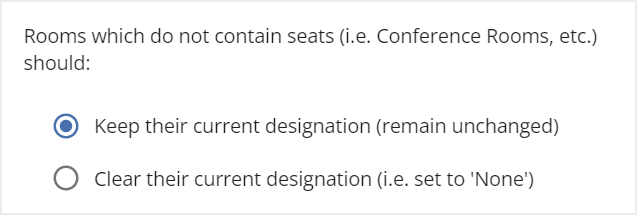
Then select whether r
ooms that do not contain seats on the selected floors should keep or reset their designations.
You can then select
Reset Assignments to reset your designations on your indicated floors.


