Please note that your subscription plan determines the specific set of features available to you, which may result in differences between what you see and the images presented in this article. For further details on the features included in your plan, please contact your OfficeSpace Admin.
Kiosks allow your visitors without an OfficeSpace account to view the floor plan on a touch-screen device. Using a kiosk, your visitors can easily locate where they have to go and who they need to meet with, in your office. If you would like the Kiosk feature to be enabled on your system, contact your OfficeSpace administrator or our Support Team.
Setting Up a New Kiosk
Changing an Existing Utility Icon to a Kiosk
Add Additional Floor Permissions to a Kiosk
Setting Up a New Kiosk
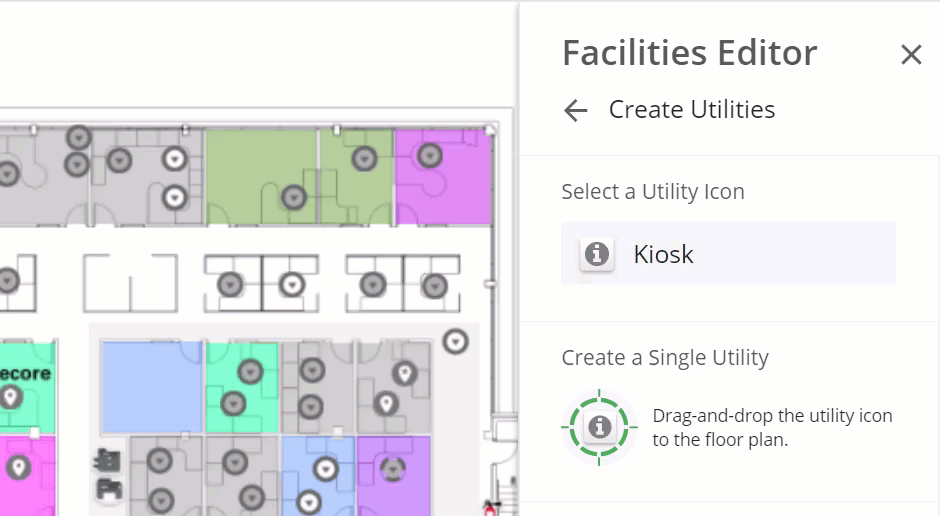
To set up a new kiosk, you will need to place a new kiosk utility icon on your floor plan. Check out the Creating a Single Utility Icon or Creating Multiple Utility Icons articles for instructions on placing a new utility icon using the Facilities Editor. You can also change an existing utility icon into a kiosk icon in Move Manager.
Using the Creating Utility screen, place a kiosk utility icon in the desired location and name the utility something easy to identify.
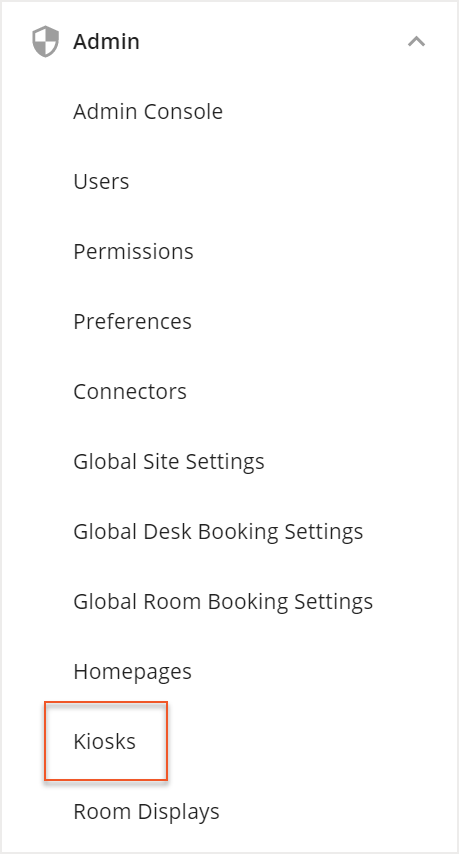
After the kiosk icon has been placed, navigate to the Manage Kiosks screen. Select the Hamburger menu in the top-right corner of the screen, and expand the Admin accordion menu. Then select Kiosks from the menu.
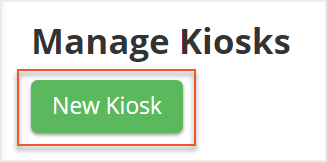
In the Manager Kiosks screen, select New Kiosk.
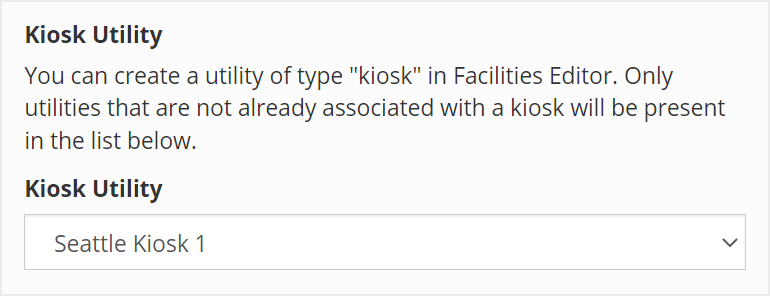
In the New Kiosk screen, select the kiosk you created from the Kiosk Utility dropdown field. The kiosk will have the same name you entered in the Creating Utility screen.
After you have selected the kiosk utility, select your desired Discovery Mode from the dropdown field. You can choose between Browse Discovery Mode or Search Discovery Mode. Your choice of mode will determine the way users can interact with and locate people or spaces on your Kiosk.
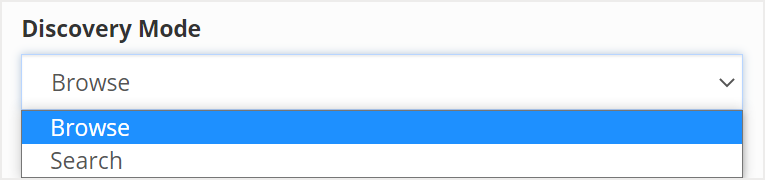
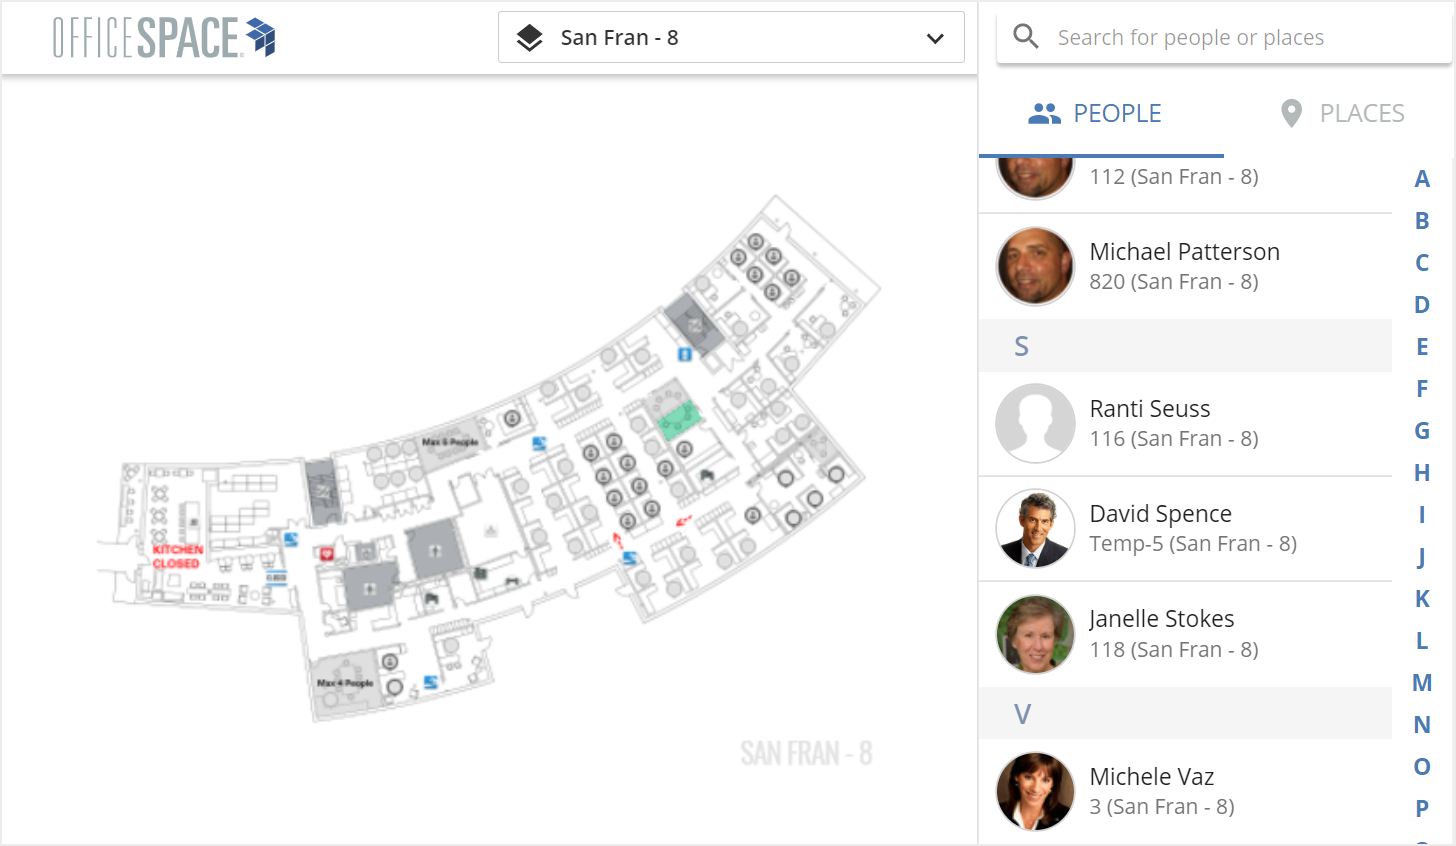
With Browse Discovery Mode, a user is able to browse a list of people, spaces, and resources alongside the floor plan on the kiosk.
If you select Search Discovery Mode, a user can search for people, spaces, or resources instead of viewing a list and Desk Booking can be enabled on your kiosk. It should be noted that in Search Discovery Mode, you will not be able to adjust the orientation of the kiosk.
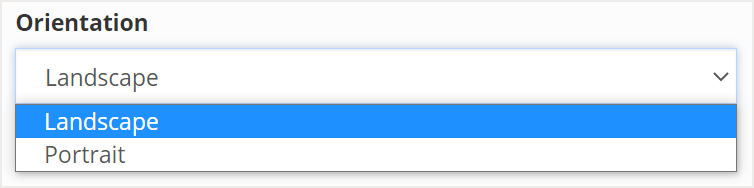
Then select your Orientation. If you have chosen the Browse Discovery Mode, you can choose between a Landscape or Portrait orientation.
Next, select the checkboxes next to the configurable features you want enabled on your kiosk. If you have selected the Search Discovery Mode, you have the option to enable Desk Booking on your kiosk instead of Allow Searching by Email.
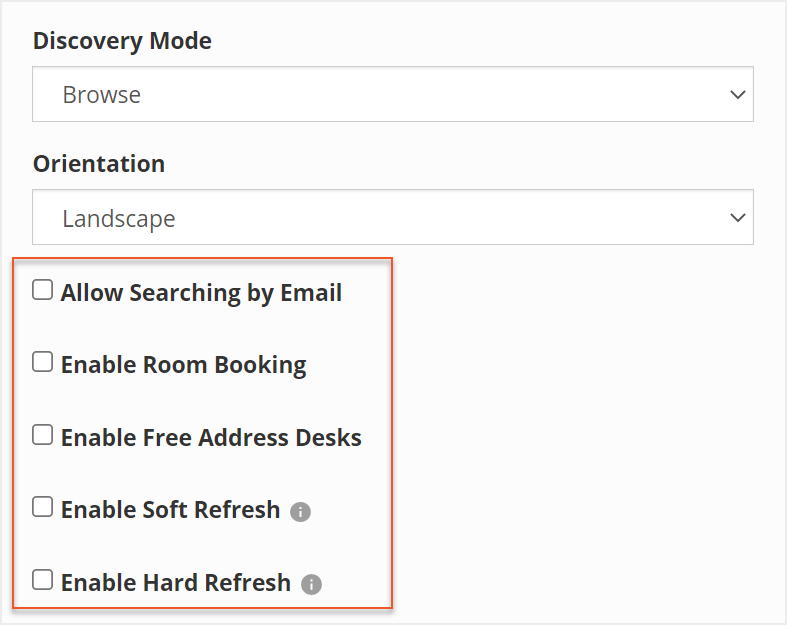
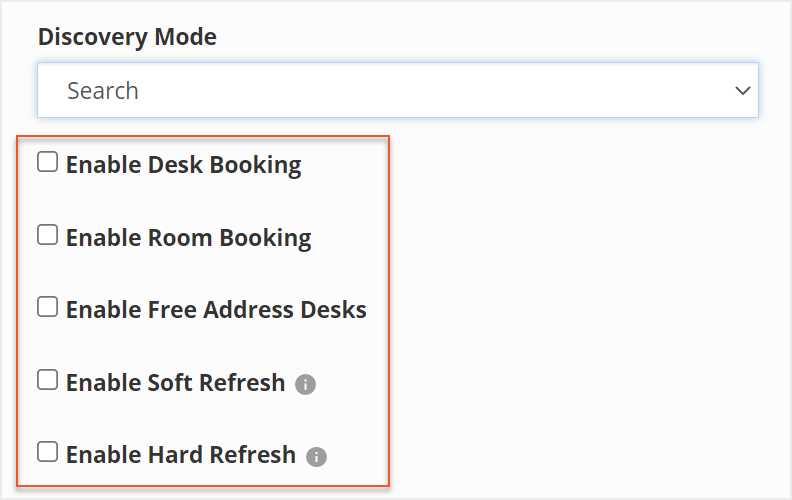
The Soft Refresh setting prompts your kiosk to perform a soft refresh after a period of inactivity. The refresh will clear any searches or selected states and restore the floor plan view to the default kiosk floor.
The Hard Refresh setting prompts the kiosk to perform a hard refresh on the kiosk after a period of inactivity. The refresh will reload the kiosk page, similar to reloading a browser page.
After you have chosen your desired settings, select Create Kiosk.

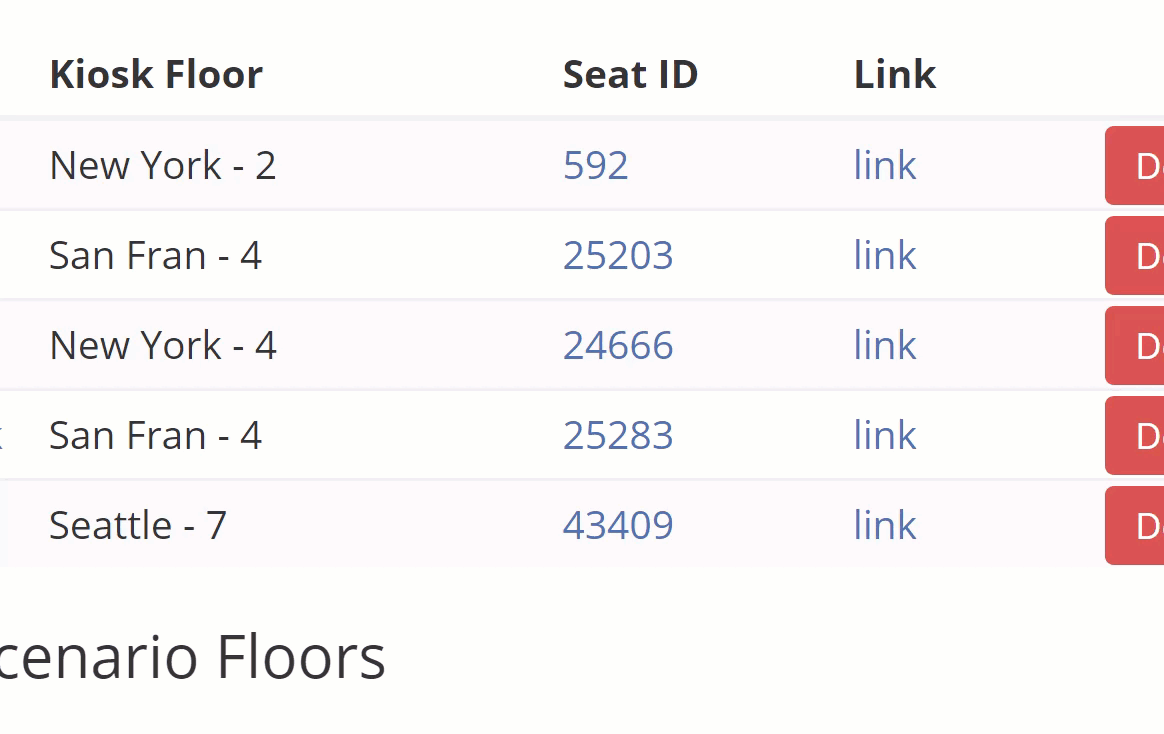
The Managed Kiosks screen then opens. To view the kiosk display, locate your new kiosk from the list and right-click and copy the link address under the Link column.
Open a new incognito browser and paste the link address into the URL bar. Hit your enter key to navigate to the link address and follow any sign-in prompts, if necessary.
Changing an Existing Utility into a Kiosk
You can modify existing utility icons on your floor plan to change them into kiosk utility icons. Navigate to Move Manager by selecting the Hamburger menu in the top-right corner of your screen. Expand the Planning Platform accordion menu and then select Move Manager.

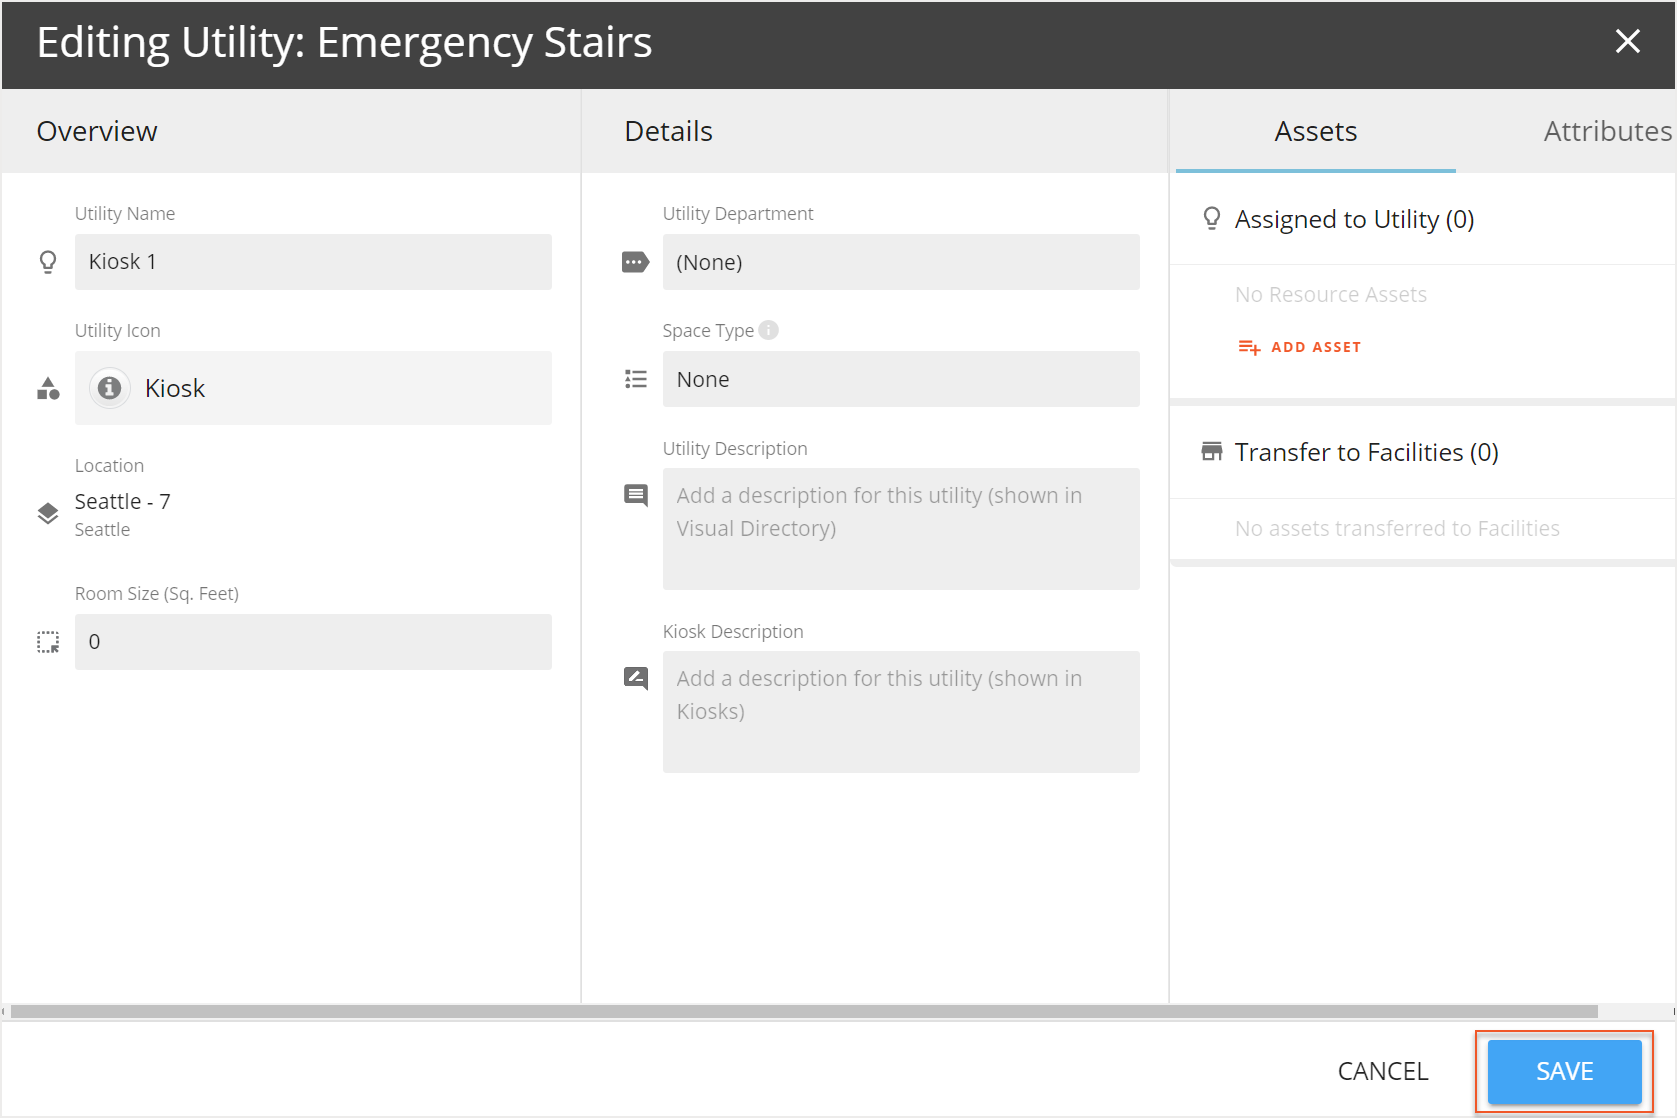
In Move Manager, locate the utility icon you want to change, and select it to open its info card. Then select the Edit button.
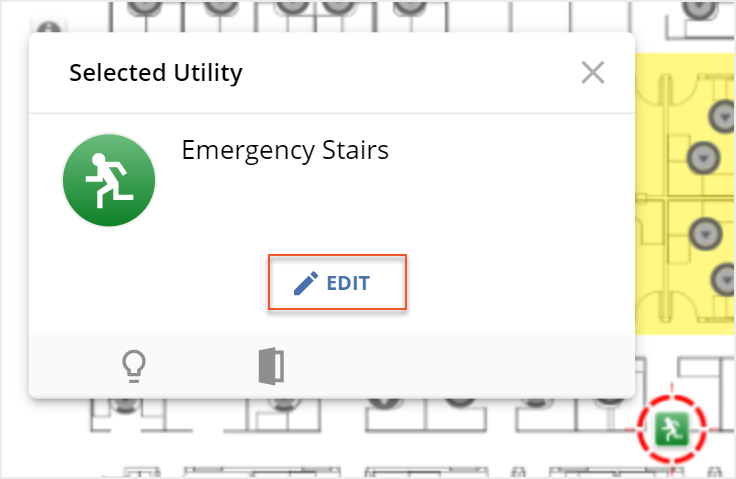
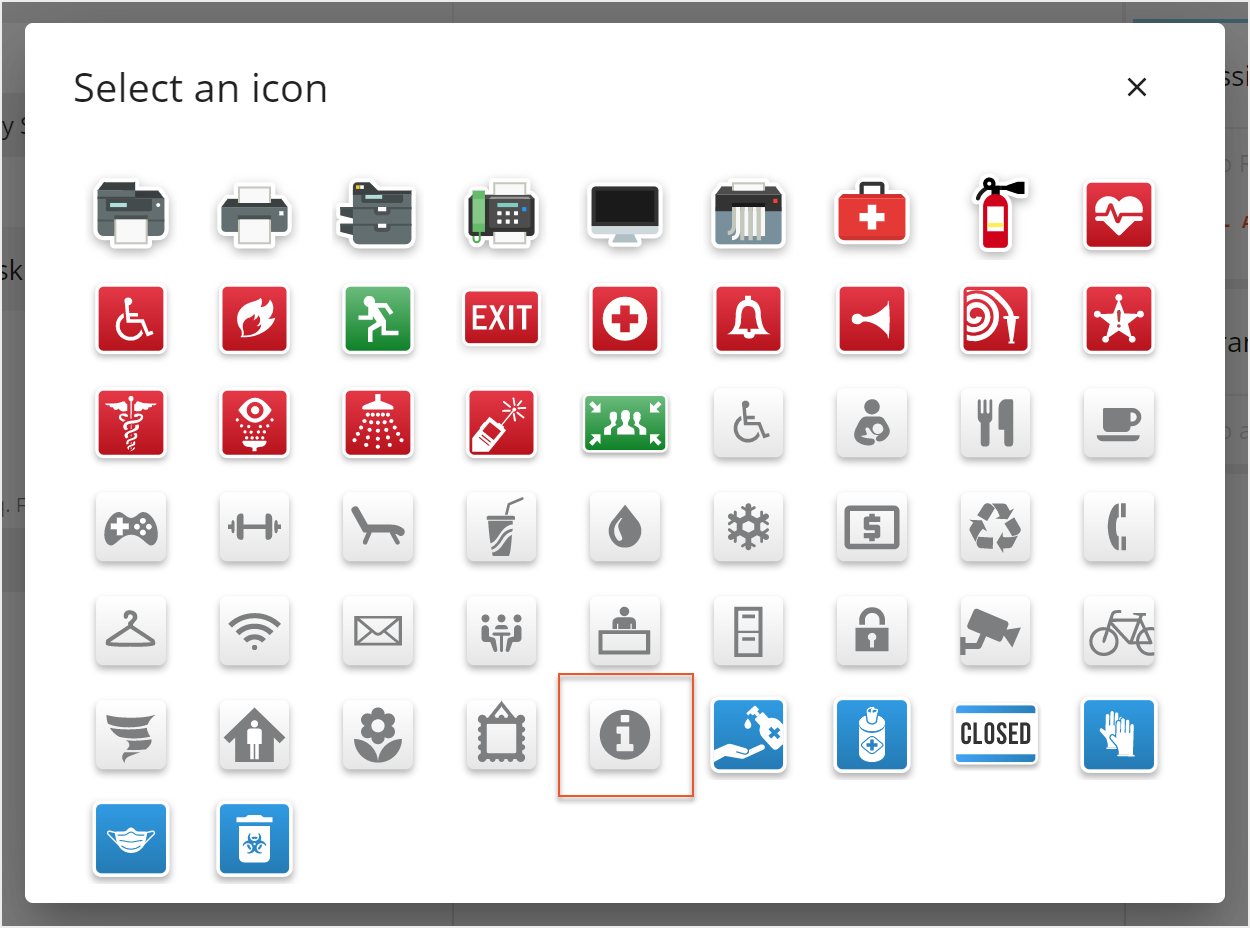
The Editing Utility screen then opens. Select the Utility Icon field and a pop-up with all available icons appears. Select the kiosk icon from the list.
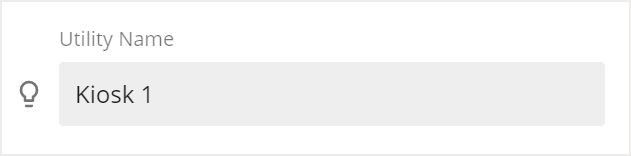
If you want to rename the utility icon, enter a name for the kiosk in the Utility Name field.
Select Save to save your changes.
Add Floor Permissions to a Kiosk
After you have set up a kiosk, you can add floors to the kiosk floor permission set, so that they may be accessed on the kiosk. Locate the kiosk you want to modify in the Manager Kiosks screen and select the Kiosk Name.

The Edit Kiosk screen then opens. Scroll down to the Floor Permission Set field, then right-click on the Floor Permission Set link and select Open link in new tab.

A new tab opens on the Edit Floor Permission Set screen for the kiosk. Under the Add floor to this permission set section, locate the floor permission set that you want to add and select Add next to the permission set.

If you want to add multiple floor permission sets, select the checkboxes next to the desired permission sets and then select the Add Selected Floors button.

You can close the new tab that you opened and return to the Edit Kiosk screen that has remained open. Select Save to save your changes.

For an overview of room booking privacy functionality with regards to kiosks, please see Global Room Booking Settings.

