Please note that your subscription plan determines the specific set of features available to you, which may result in differences between what you see and the images presented in this article. For further details on the features included in your plan, please contact your OfficeSpace Admin.
In order to receive room booking suggestions in Outlook, you'll need to set up the OfficeSpace for Outlook Add-In in the
Connectors panel in
Admin.
PrerequisitesGetting the Manifest File from OfficeSpaceUploading the Manifest File to Microsoft
Prerequisites
If you do not have access to the Admin area of OfficeSpace, please speak with your System Administrator or OfficeSpace support representative.
You'll also need to have access to the
Microsoft Exchange Admin Center. Please speak with your Microsoft representative if you are unable to access this.
Please note that depending on updates by Microsoft, the Exchange Admin Center may appear differently than it does in this article.
Getting the Manifest File from OfficeSpace
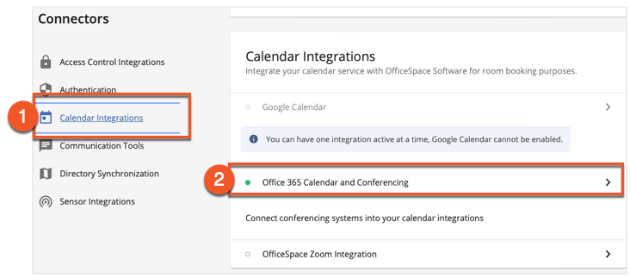
First, navigate to the
Calendar Integrations panel (1) on the Connectors panel in Admin. Then select the
Office365 Calendar and Conferencing option (2) under this panel.
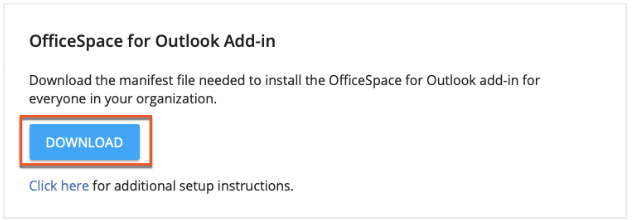
Next download the manifest file by selecting Download under OfficeSpace for Outlook Add-In.
Uploading the Manifest File to Microsoft
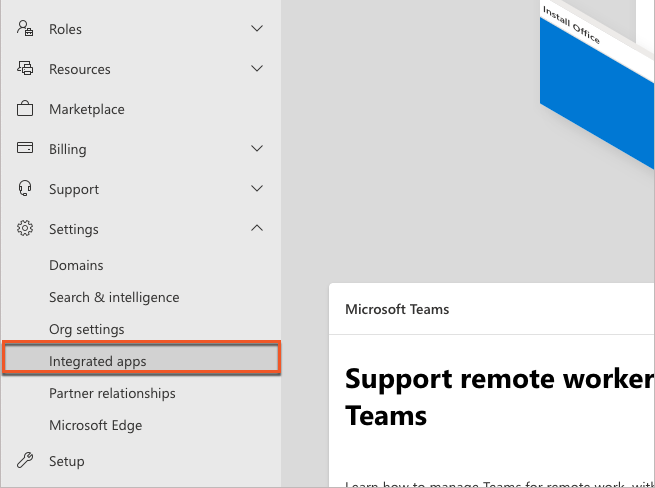
Now that you have the manifest file, go to the Microsoft 365 Admin Center at https://admin.exchange.microsoft.com/ and select the
Integrated apps sub-menu in the action panel on the left-hand side of the screen.
Select
Upload Custom Apps.

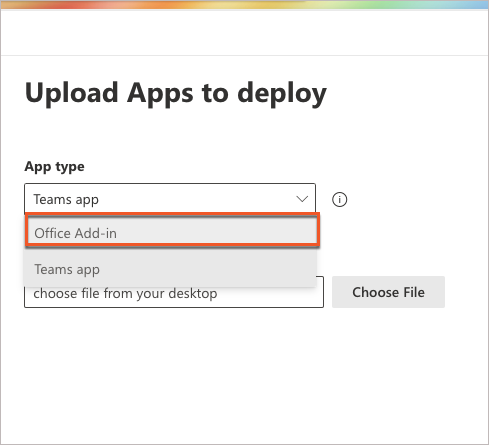
Choose
Office Add-in from the App Type menu.
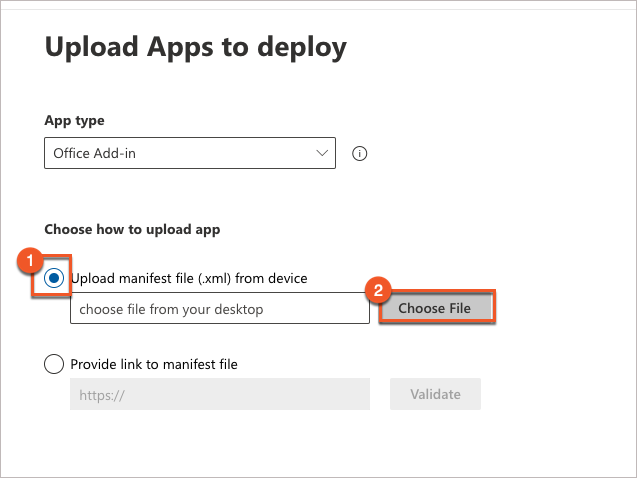
In the Upload Apps to deploy window, select the
Upload manifest file (1) radial button, followed by
Choose File (2) to bring up a dialog box to select the manifest file.
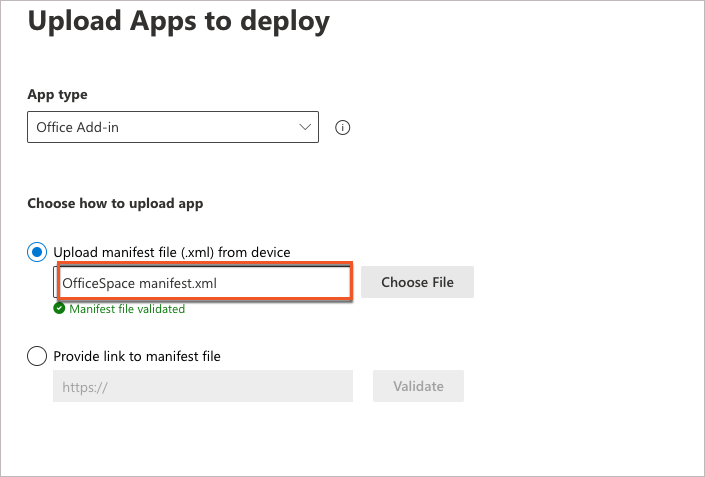
Choose the
OfficeSpace manifest file that you downloaded earlier, when prompted.
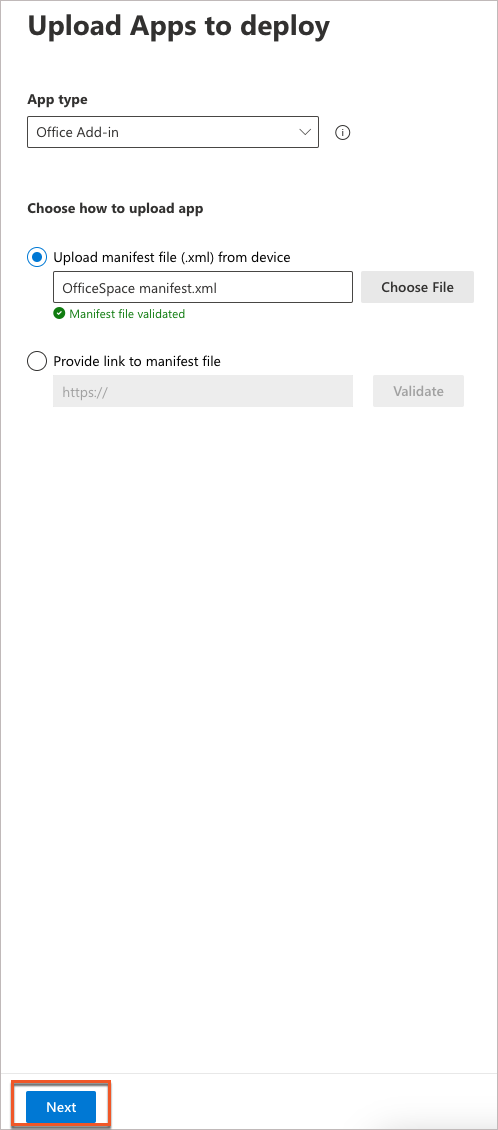
Select
Next.
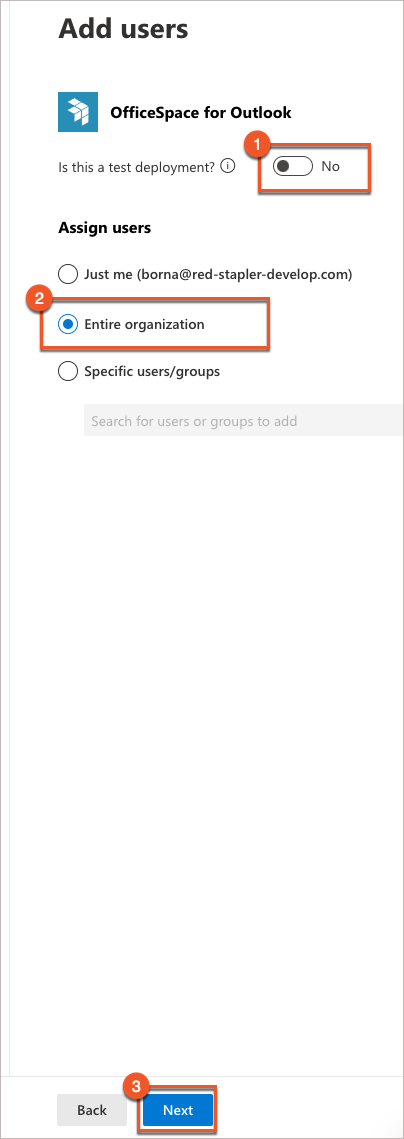
On the Add users screen, make sure that the
toggle (1) for test deployments is set to No. Select the
Entire organization (2) radial button as you'll want to deploy this add-in to your entire organization. Then select
Next (3).
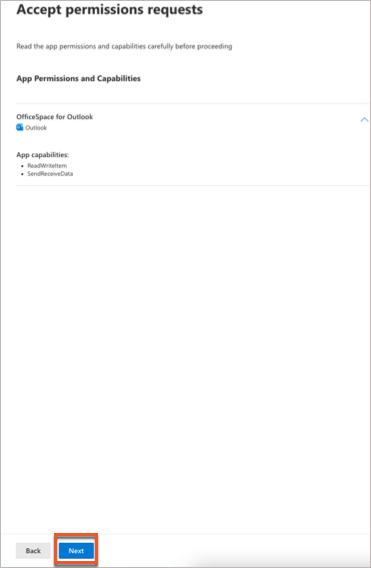
You'll now be asked to agree to give the OfficeSpace for Outlook Add-in certain capabilities. Select
Next to continue.
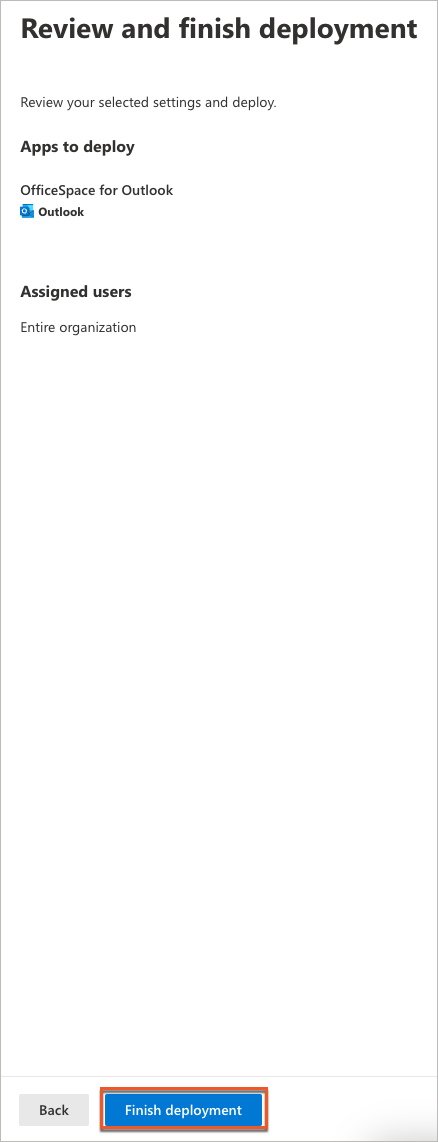
Finally, you'll be given a summary of what app will deploy, and which users will have access to it. This summary should explain that the OfficeSpace for Outlook Add-in will be deployed, and that the entire organization will have access. Select
Finish deployment to complete the deployment of OfficeSpace for Outlook. Now that this is complete, you can use the Add-In when
booking rooms with Office365.