Please note that your subscription plan determines the specific set of features available to you, which may result in differences between what you see and the images presented in this article. For further details on the features included in your plan, please contact your OfficeSpace Admin.
With stack plans, you can easily change the placement of departments across your facility. You can also visualize the occupancy across floors and see how your workplace is distributed, allowing you to optimize your space. A stack plan can also be converted into a scenario floor, allowing you to see how your departments would look on an actual floor plan.
You must be a System Admin, Facility Admin, or IT Admin to access stack plans.
Navigating to Stack PlansCreating a Stack PlanUsing Stack PlansCreating a Scenario from a Stack Plan
Navigating to Stack Plans
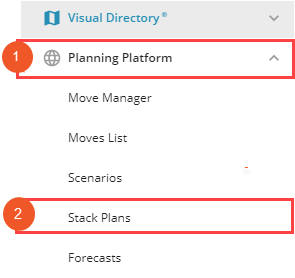
Open the Hamburger menu and select the
Planning Platform accordion menu (1). Then, select
Stack Plans (2).
Creating a Stack Plan
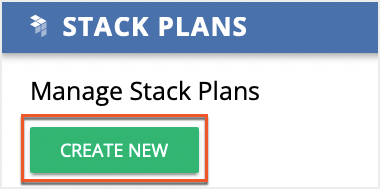
To start creating a stack plan, select
Create New in the top-left corner of the screen.
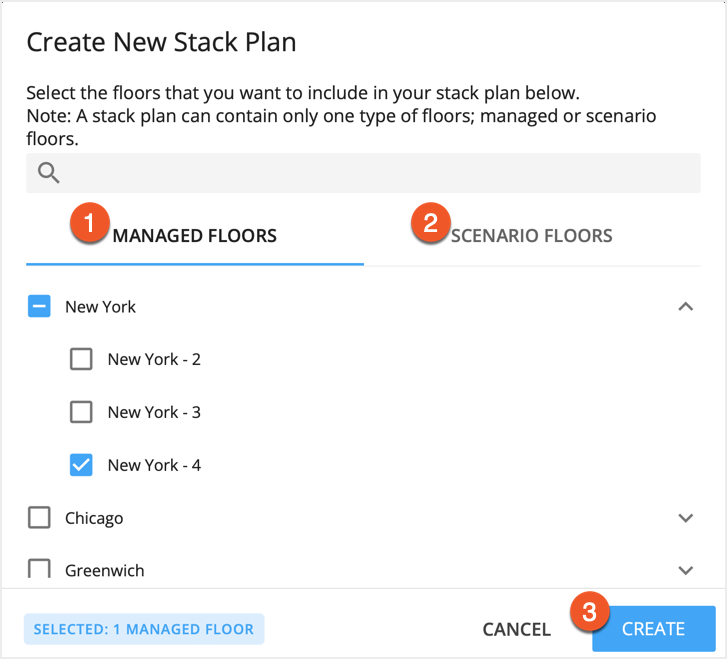
You'll be presented with a pop-up window asking you to select the floors for which you would like to create a stack plan. Using the tabs at the top of the window, you can look at the list of
Managed Floors (1) or
Scenario Floors (2). Choose a single floor, multiple floors, or an entire location by selecting the respective checkbox.
It is not possible to make a stack plan that includes both managed and scenario floors. When working with scenario floors, it is not possible to work on more than one at a time.
After you have chosen the floors for your plan, select
Create (3) to create your plan.
Using Stack Plans
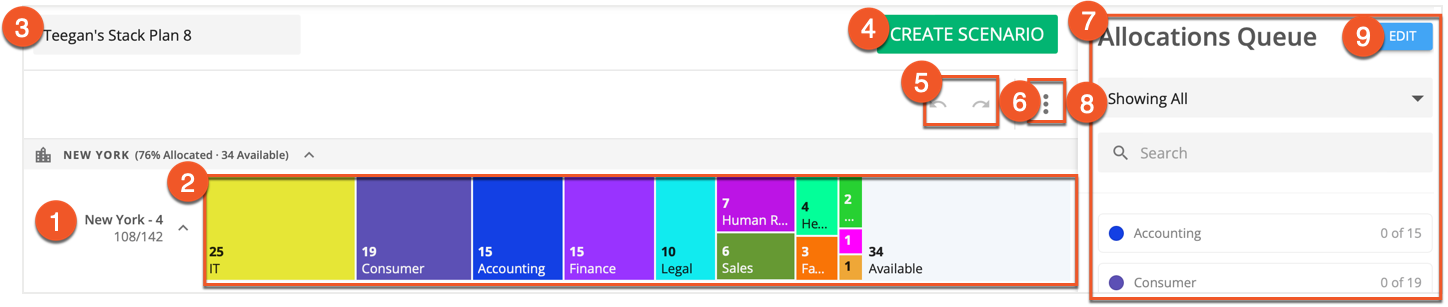
You'll now be presented with a stack plan based on the floor that you have chosen. For each
floor (1) you'll see a
series of blocks (2) that display the number of seats allocated on the floor for a particular department.
Above the stack plans for your selected floors, you’ll see the
name field (3) containing the name of your stack plan. This field is sequentially generated by OfficeSpace as you create new plans, but you can change the name at any time by selecting the field and entering in a new name.
You will also see the
Create Scenarios button (4) allowing you to create a scenario floor from your current stack plan.
Underneath this button, you’ll see the
undo and
redo icons (5) allowing you to undo and redo your actions while working, and the
Overflow menu (6) containing additional actions that you can perform.
Along the right-hand side you'll find the
Allocations Queue (7), allowing you to view your current allocation targets for your selected floors by department. Selecting Showing Queued from the
dropdown (8) displays a list of blocks that you have removed from your plan while you work.
You can also view and edit detailed information on allocations, and even add departments, by selecting the
Edit button (9).
 Working with BlocksBlock Size TabDistribution TabUsing the Allocations QueueDepartment Allocation Targets PanelAdd Department PanelOverflow Menu
Working with Blocks
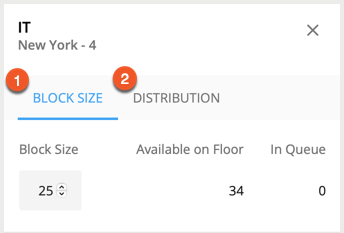
Selecting any block in your stack plan brings up the details for that block, including the
block size (1) and
distribution (2) tabs, each of which can be accessed by selecting the respective tab.
A block can be moved to the Allocation Queue by selecting it, and then holding and dragging it to the allocations queue.
Block Size Tab
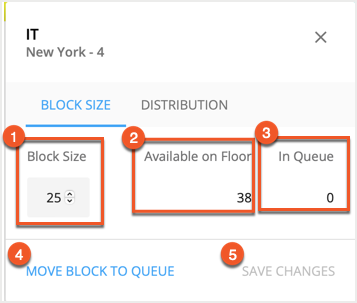
The Block Size tab contains the
Block Size field (1), which allows you to increase or decrease the size of the block, within available capacity parameters. The
Available on Floor field (2) tells you how many seats are left available on the floor, and the
In Queue field (3) displays the number of available seats that have been temporarily removed from the stack plan and placed in the Allocation Queue.
You can also select
Move Block to Queue (4) to move the block to the Allocations Queue and take the counts for this block out of your plan while you work.
After you've finished your modifications to the block, you can
Save Changes (5).
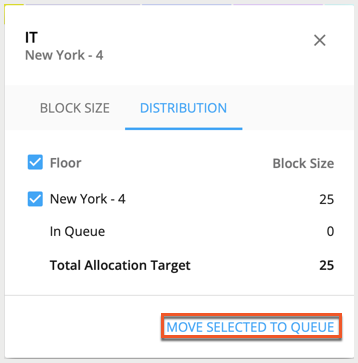
Distribution Tab
The Distribution tab shows you the breakdown of seats in each block, across each floor and in the queue, along with the Total Allocation Target for the department. You can move a floor to the queue by selecting the checkbox next to the floor, and then selecting
Move Selected to Queue.
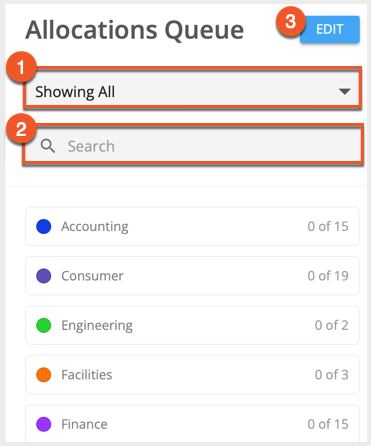
Using the Allocations Queue
By default, the Allocations Queue displays the total remaining seats to be allocated for all departments on your floor. You can use the
dropdown (1) to select Showing Queued, which displays the amount of seats available to allocate for each department on your floor.
The
search field (2) allows you to narrow the displayed department list to departments containing a particular search term.
The
Edit button (3) pulls up a pop-up window containing the Department Allocation Targets panel.
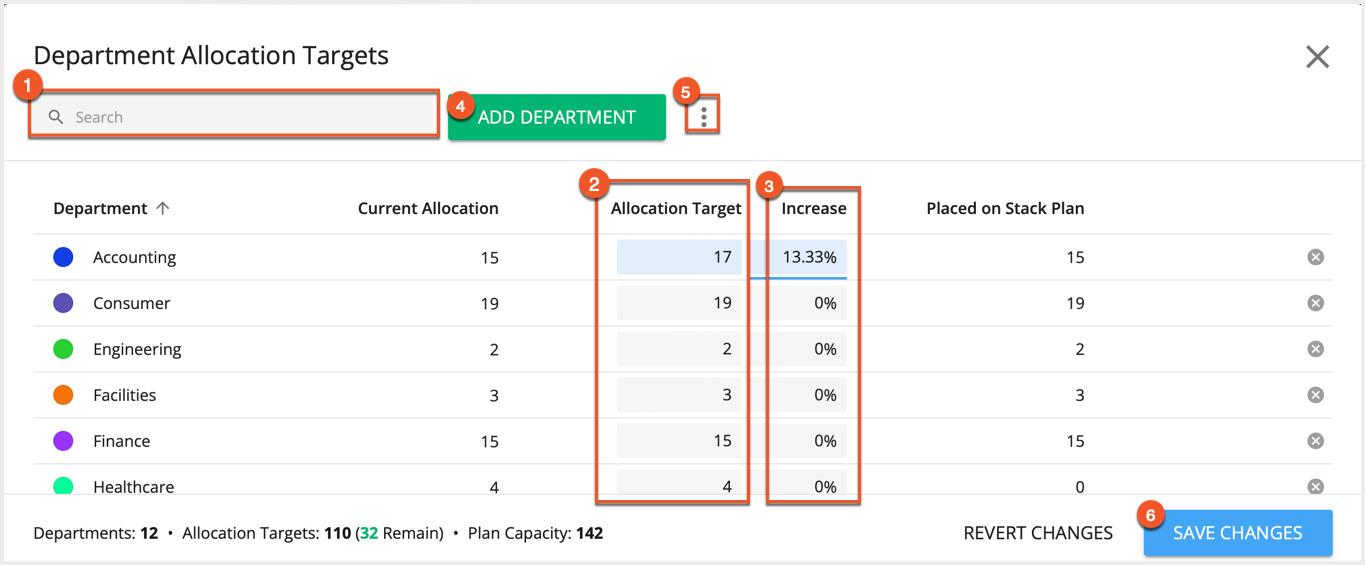
Department Allocation Targets Panel
The Department Allocation Targets panel allows you to modify the allocation targets for each department in your stack plan.
You can use the
search field (1) to search for a particular department. The
Allocation Target field (2) next to each department allows you to enter in a new target value for that department in your stack plan. You can also opt to increase your allocation target by entering a percentage into the department's
increase field (3).
If a department in your organization does not exist in your current plan, you can add it by selecting
Add Department (4) to bring up the
Add Department panel.
The
Department Allocation Targets overflow menu (5) allows you to add a list of departments by uploading a CSV file, to reset all targets to their current allocation, and to delete all departments from the list. There is also an option to download the Department Allocation Targets List as a CSV file.
If you have made modifications to your department allocation targets that you would like to finalize, select
Save Changes (6).
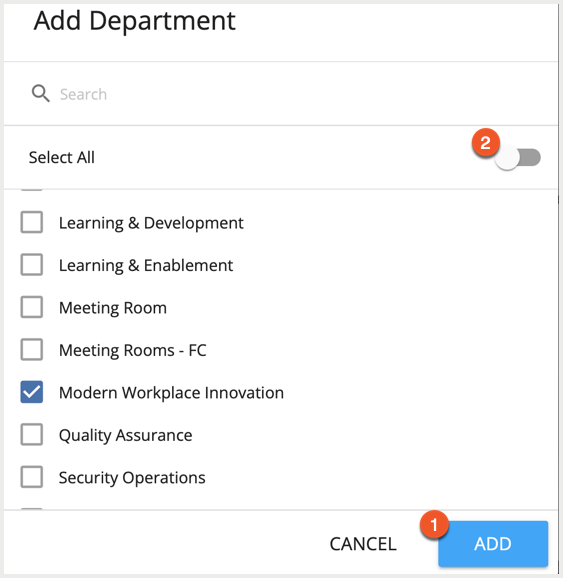
Add Department Panel
To add a department to your stack plan, select the checkbox next to the department(s) you would like to add, followed by
Add (1). It is possible to add all of the departments in this list by using
Select All toggle (2).
Overflow Menu
Using the
Overflow menu to the left of the Allocations Queue, you can perform additional functions on your stack plan such as editing floor capacity, clearing floors, and resetting your work up to that point.
Clear one or more floors presents you with a pop-up where you can select one or more floors and send all of the blocks for that floor to the queue.
Reset stack plan to current allocations restacks all of the floors as they are currently allocated on the managed floors themselves, and places any excess allocations in the queue.
Add floors to the stack plan allows you to add floors to your stack plan in three different ways. For more on this option, please see
Advanced Stack Planning.
Remove floors allows you to remove the blocks from the selected floors and send the blocks to the queue. Unlike the reset option, it does not affect the allocation target for your plan.
Configure Floors allows you to edit the floor capacities for each of the floors in your stack plan.
Creating a Scenario from a Stack Plan
By selecting the green
Create Scenario button next to the Allocations Queue, you can create a
scenario floor from your stack plan.
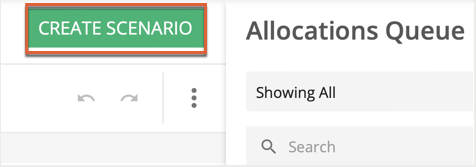
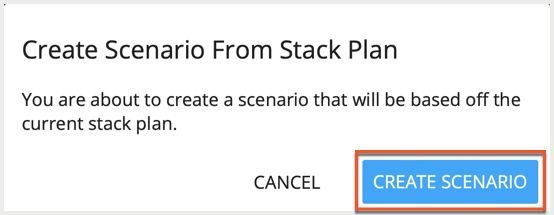
Just select the blue
Create Scenario button from the resulting pop-up to proceed.
A blank scenario floor with your
Allocation Queue (1) is created and displayed on the right-hand side of the screen, letting you know what desks are still left to be allocated for each department.
A
progress bar (2) is located at the bottom of the Allocation Queue. Use this tool to see how many seats have been allocated out of the total number of seats in the queue.
If you would like to reverse an action or redo one, the
undo and
redo icons (3) are located underneath the progress bar.
Finally, if you would like to clear the selected desks and return their allocations to the queue, select
Clear Selected Desks (4).
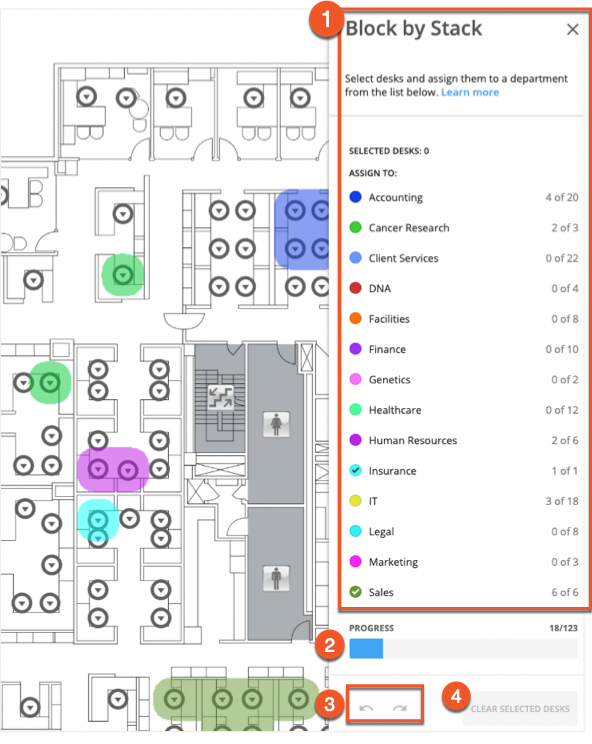
Using Block by Stack to Allocate Seats
Now that your stack plan has been converted to a scenario floor, you can select desks by holding Shift and selecting individual desks, or by holding Shift and dragging to select a group of seats. If you're using a tablet, press and hold near a group of seats that you'd like to select, then drag and release to select the group.
To allocate them to a department by selecting that department in the Allocations Queue.
After you have completed your allocations, close the Block By Stack panel to see your stack plan laid out over your scenario floor.

