Please note that your subscription plan determines the specific set of features available to you, which may result in differences between what you see and the images presented in this article. For further details on the features included in your plan, please contact your OfficeSpace Admin.
Making a Move on the Same FloorMaking a Move Across FloorsUsing Move SchedulerMaking Moves on Scenario FloorsMaking Moves to Assigned Seats
Making a Move on the Same Floor
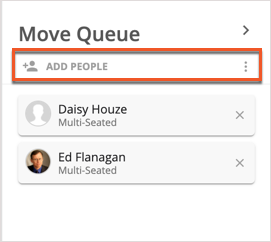
Select
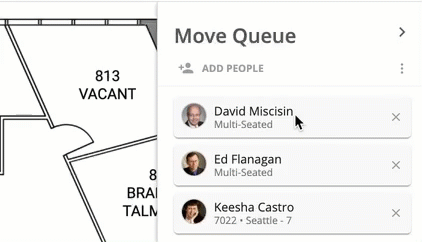
Move Queue from the Action Panel in Move Manager.

Next, select
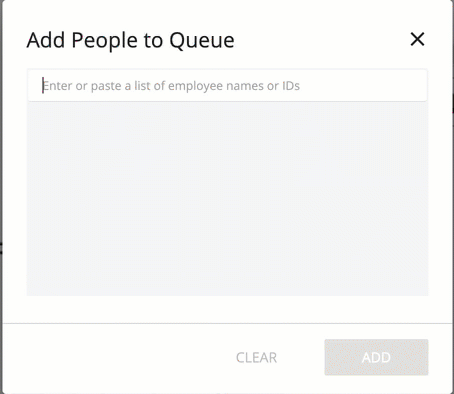
Add People to be presented with the Add People to Queue pop-up.
Enter the names or IDs of the people you'd like to move in the search field and select
Add to add them to the queue.
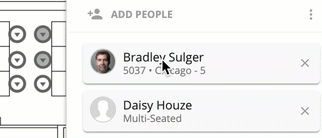
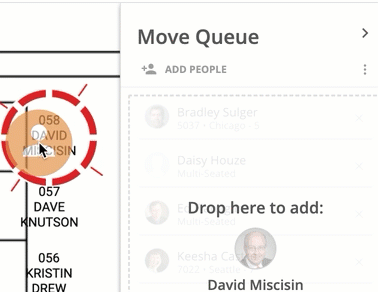
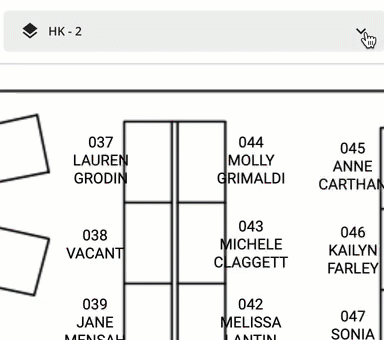
Now that the names are in the queue, you can select and drag a name to a seat on the floor plan. Doing so will bring up
Move Scheduler, which allows you to schedule your move.
Making a Move Across Floors
Select
Move Queue from the Action Panel in Move Manager.

Next, select the person that you'd like to move on your floor plan, and drag them to the Move Queue.
Select the destination floor in the
floor picker.
Now, select and drag the employee to their seat on the new floor.
Move Scheduler opens automatically.
Remember that an employee will remain in the Move Queue until you've assigned them a seat.
Using Move Scheduler
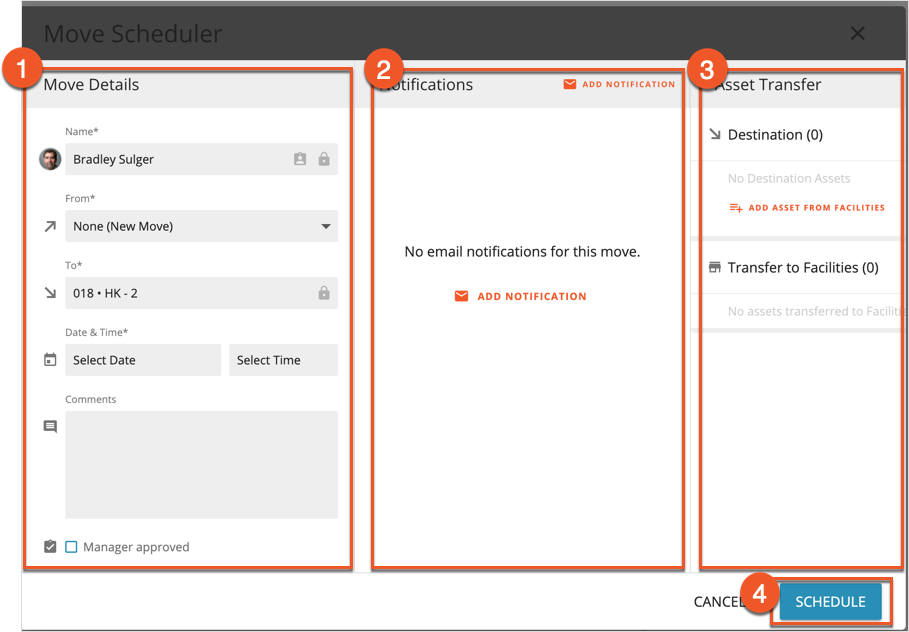
In Move Scheduler, you're able to enter and confirm all of the details of your move. The panel is divided into three sections:
Move Details (1),
Notifications (2), and
Asset Transfer (3). When you've entered in all of the details of your move, set up notifications, and added any required assets, select
Schedule (4) to schedule your move.
Move Details
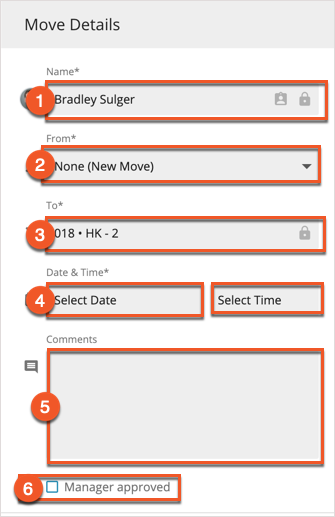
In Move Details, you'll enter the most important details about your move. The
Name field (1) will contain the name of the employee who’s being moved into a new seat. This field will be locked if you've pulled them into a seat from the queue.
The
From picker (2) will be prepopulated with a value of "None", though you can enter an employee’s seat, if they currently have one.
The
To picker (3) will be prepopulated with the employee’s newly-assigned seat, but this field can also be modified.
Using the
Date picker (4), select a date for the move. With the
Time picker (5), select a time for the move to take place.
In the
Comments field (5), enter in any comments that you have about the move. These comments will be visible to anyone who can read the details of the move in Move Scheduler, or by any other method.
Select the
Manager approved checkbox (6) if you wish to indicate that the move has manager approval.
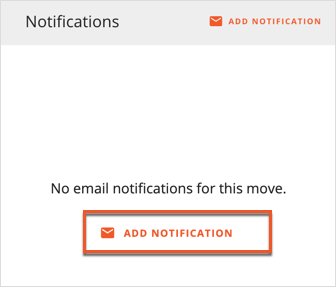
Notifications
In Notifications, you can add email notifications that will be generated in relation to the move. Select
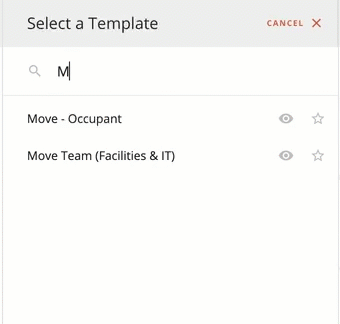
Add Notification to search for a template for a notification.
Some commonly-used notifications are displayed by default, but you can find others by typing into the
search field.
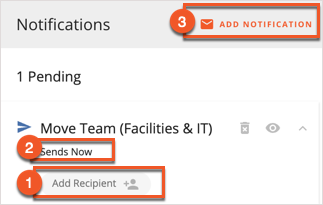
After you've selected a notification template to send, select
Add Recipient (1) to add a recipient for the notification. An indication of
when the notification will send (2) will be located underneath the name of the notification.
You can send more than one notification with a move, just select
Add Notification (3) to search for another notification.
Asset Transfer
Using the Asset Transfer area of Move Scheduler, you can add any
assets that the employee needs at their
Destination (1) to the scheduled move, so that the employee will have what they need at their new seat.
Any assets returning to Facilities will be automatically noted as part of the details on the move, under
Transfer to Facilities (2).
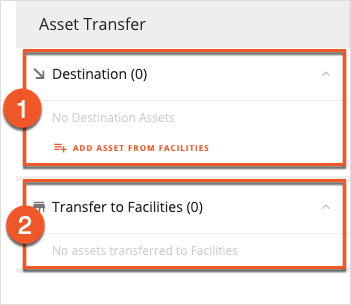
Adding a Destination Asset
Select
Add Asset From Facilities under Destination to add an asset to a move. These assets are defined in Preferences by your organization. You can add multiple assets to the same move. Select
Return to Facilities next to an item in the list to remove it.

Making Moves on Scenario Floors
The process for making moves on Scenario floors is almost exactly the same, with the Scenario Queue used in place of the Move Queue. For more information on Scenarios, see
Introduction to Scenarios.
Making Moves to Assigned Seats
You can also
move people into assigned seats using Move Queue and Smart Queue, or by using occupy moves to add employees to assigned seats.

